
Searching for small pantry organization ideas that go beyond the perfectly-styled photos you see on Pinterest and actually work in real-life kitchens? You’ve come to the right place. Most pantry organization advice assumes you have a walk-in pantry with custom built-ins and unlimited budget for matching glass jars. The reality for most homeowners is far different — a small awkward closet pantry, a single tall cabinet, or maybe even just a few shelves in the kitchen that are perpetually overflowing with mismatched packages, half-empty boxes, and items pushed to the back where they expire forgotten.
In this complete step-by-step guide, you’ll learn exactly how to organize a small pantry from start to finish, regardless of what kind of space you’re working with. We’ll cover the entire process — emptying, cleaning, categorizing, choosing the right pantry shelving and storage solutions, implementing pantry storage hacks that maximize limited space, and crucially, the maintenance habits that keep your pantry organized for the long haul. By the end, you’ll have a pantry that not only looks beautiful in photos but actually functions in your real life, helps you waste less food, and makes meal planning genuinely easier.
Pin this guide to your “Home Organization Hacks” board so you can reference each step as you tackle your pantry project!
Why Pantry Organization Is Worth the Effort
Most people see pantry organization as a vanity project — something to do for aesthetics rather than for practical reasons. The reality is that a well-organized pantry pays off in concrete, measurable ways that go far beyond how it looks. Once you’ve experienced the difference, you’ll never go back to a chaotic pantry, even if the styled photos weren’t your motivation in the first place.
A disorganized pantry costs real money in food waste. Items get pushed to the back, forgotten, and discovered months later expired. Duplicate purchases happen constantly because you can’t see what you already own — most households throw away hundreds of dollars worth of expired pantry goods every year without realizing it. An organized pantry where you can see everything at a glance dramatically reduces waste because nothing disappears into the void.
Beyond the financial benefits, an organized pantry transforms how you cook and meal-plan. Recipes that previously felt overwhelming become approachable when you can quickly verify what you have on hand. Weeknight dinners come together faster when ingredients are exactly where you expect them. Grocery shopping becomes more efficient because you can see at a glance what needs replenishing. The mental load of cooking decreases significantly when the pantry isn’t a source of friction in every meal.
The good news is that even the smallest, most awkward pantries can be dramatically improved with the right approach. The following step-by-step process works for walk-in pantries, single-cabinet pantries, narrow closet pantries, and everything in between.
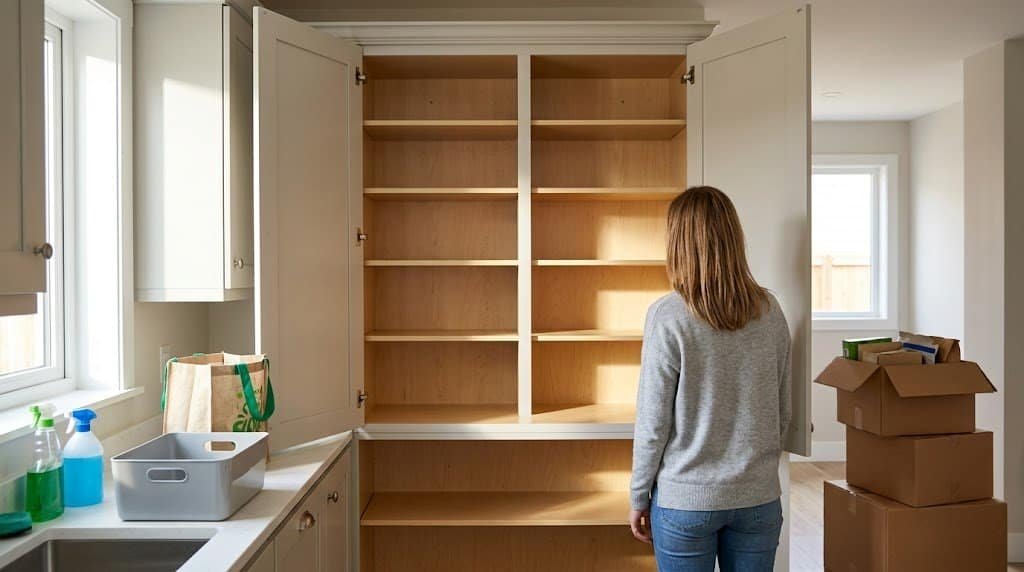
Step 1: Empty Your Pantry Completely
Before you can organize a small pantry effectively, you have to see exactly what you’re working with — and that means taking everything out. This step feels overwhelming and most people resist it, but skipping it is the number one reason pantry organization projects fail. You cannot create an effective system around items you can’t see, and you cannot accurately assess your space while it’s full of stuff.
Block off a few hours on a weekend morning when you have energy for the project. Lay out a large flat surface — your kitchen counter, dining room table, or even a clean section of floor — to hold everything as it comes out. Pull out every single item, including those mystery cans pushed against the back wall, the spice jars you forgot existed, and the random bags of something you don’t even remember buying. Resist the urge to “start organizing” while items are still in the pantry; the mess gets worse before it gets better, and that’s okay.
As you empty, group similar items together loosely on your work surface. All the canned goods in one zone, baking supplies in another, snacks in a third, and so on. Don’t worry about making it perfect — you’re just creating rough categories that will inform the next steps. This visual inventory is genuinely revealing for most people. You’ll discover duplicates you didn’t know about, expired items you forgot, and ingredients you bought for one specific recipe and never used again.
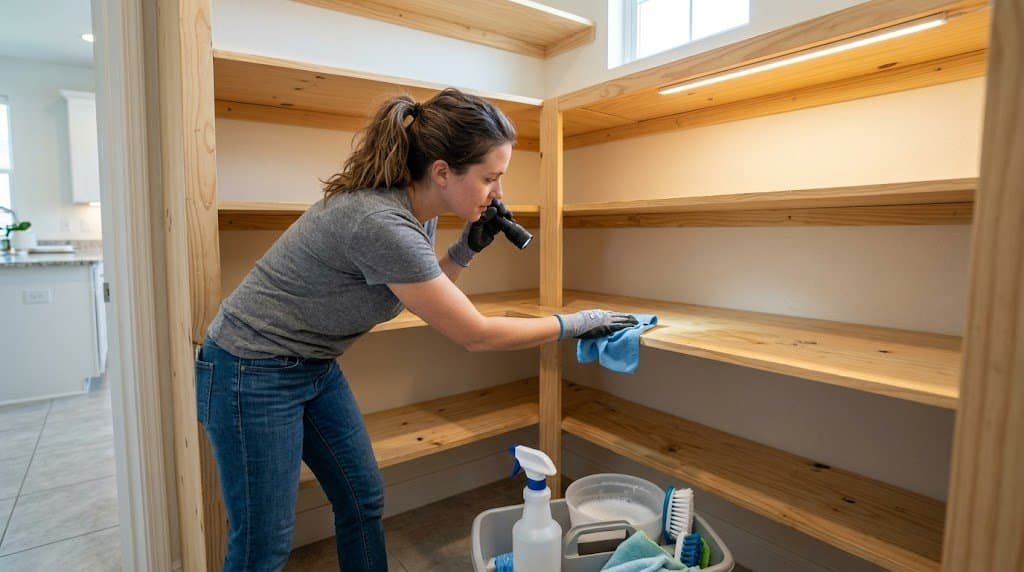
Step 2: Clean and Inspect Your Empty Pantry
With your pantry completely empty, you have a rare opportunity to clean it thoroughly. This step often gets skipped in the rush to start putting things back, but a clean pantry is the foundation of an organized one. Crumbs, sticky residue, dust, and food debris harbor pests and create the kind of grime that gradually makes the entire space feel uncared for.
Take everything off the shelves including any liners, contact paper, or storage containers. Vacuum the corners and crevices first to remove loose debris. Wipe down every shelf, the walls, and the door with a mild cleaning solution (a mix of warm water and dish soap works well, or use a vinegar-water solution for a more natural approach). Pay special attention to corners where crumbs accumulate and to the underside of any wire shelving where food residue collects.
While the pantry is empty, also inspect for any structural issues you might want to address. Are shelves wobbling? Could you add an extra shelf to maximize vertical space? Is there a wall surface that could benefit from a fresh coat of paint or peel-and-stick wallpaper for a cleaner, brighter feel? This empty-pantry moment is the easiest time to make small improvements that significantly impact the final result. Adding a coat of light-colored paint or installing additional shelving while the space is bare takes a fraction of the time it would after you’ve reorganized.
Step 3: Edit Ruthlessly Before Putting Anything Back
This is the step most people resist most, but it’s the single most important determinant of whether your pantry organization will actually work. Going through every single item and deciding whether it deserves space in your newly organized pantry — rather than just shoving everything back in — is what separates organized pantries from cluttered ones with prettier containers.
Examine each item with three questions: Is it expired? Will my family actually use this within the next three months? Do I have multiples of this that I don’t need? If the answer to any of these questions reveals the item shouldn’t stay, get it out immediately. Expired items go in the trash. Items still good but unlikely to be used can be donated to a food pantry where they’ll actually feed someone. Excess duplicates can be donated or returned to the active rotation.
Be especially honest about specialty ingredients you bought for single recipes, exotic items that seemed appealing in the store but never made it into rotation, and bulk-buy mistakes that gave you far more of something than you can reasonably use. These items occupy valuable real estate while delivering no actual value. The pantry that contains only items you actually use is dramatically easier to organize and maintain than one stuffed with aspirational ingredients.

Step 4: Categorize Your Remaining Items by Use
Now that you’ve eliminated everything that shouldn’t stay, organize your remaining items into clear functional categories. The categories you choose will determine how your pantry shelving gets used, so think about how you actually cook and meal-plan rather than just defaulting to generic groupings.
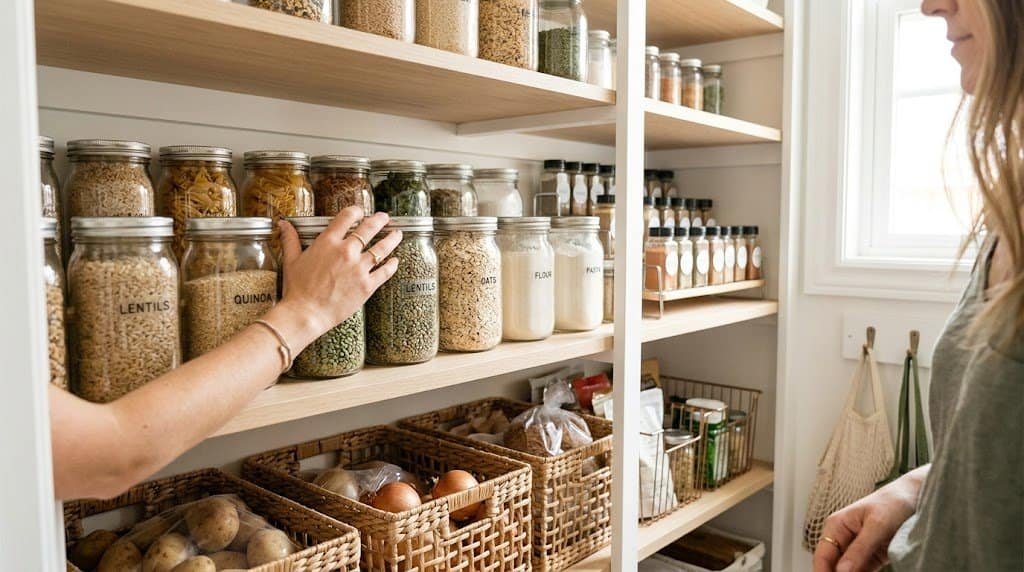
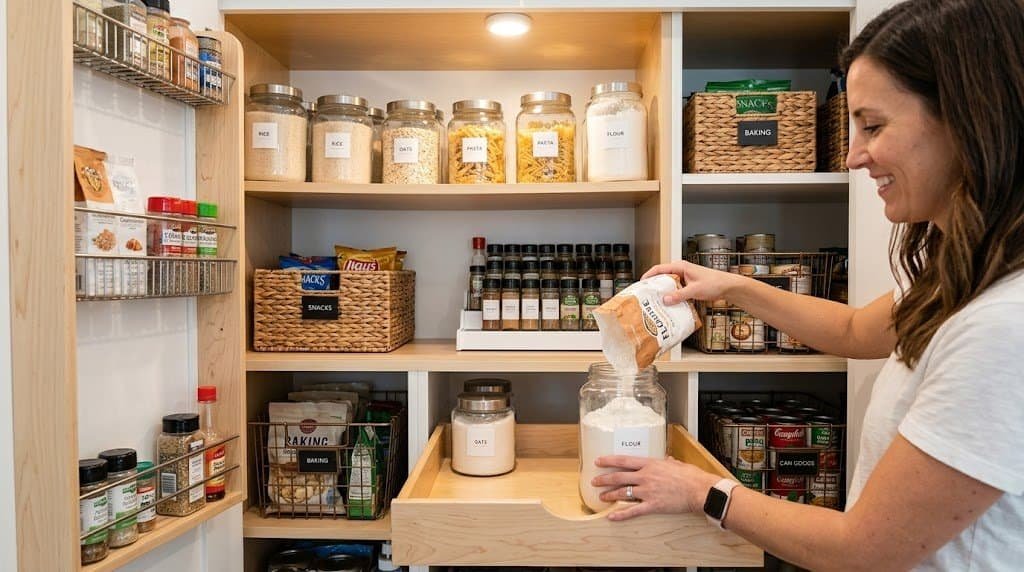
Common categories that work for most kitchens include: baking supplies (flour, sugar, baking powder, chocolate chips, etc.), pasta and grains (dry pasta, rice, quinoa, oats), canned goods (subdivided by type if you have many — beans, vegetables, tomato products, soups), breakfast items (cereal, granola, instant oatmeal), snacks (chips, crackers, nuts, dried fruit), condiments and oils (vinegar, oils, sauces that don’t need refrigeration), spices and seasonings, and beverages (coffee, tea, drink mixes). Adjust based on your actual collection.
Some additional useful categories for specific cooking styles: Asian ingredients (soy sauce, rice vinegar, sesame oil, noodles), Mexican ingredients (taco seasonings, masa, hot sauces, peppers), or baking specialty (cookie cutters, sprinkles, food coloring, candy melts). Creating specific zones for the cuisines you cook most often makes weeknight meal prep dramatically faster because everything you need lives together.
Step 5: Plan Your Pantry Layout Strategically
Before placing items back, think strategically about which categories should go where based on three factors: frequency of use, weight of items, and visibility needs. The most-used items should be at eye level for adults (or at appropriate heights for children if they need access). Heavy items belong on lower shelves so they can’t fall and injure someone. Items you need to see at a glance should be on shelves that aren’t crowded.
Eye-level shelves are prime real estate for items used daily: breakfast cereals, the spices you reach for constantly, your everyday cooking oils, the snacks family members grab regularly. Lower shelves work well for heavy bags of flour, large bottles of liquids, and bulk items that don’t move often. Top shelves are best for rarely-used items like seasonal baking supplies, specialty equipment, or extra paper goods that you can pull down once a month rather than daily.
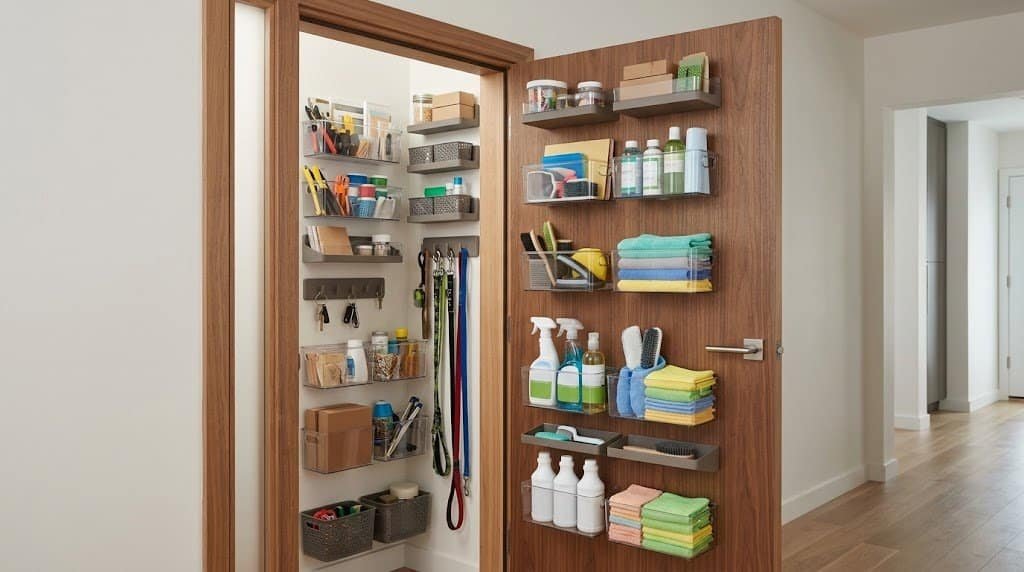
Consider the door itself if your pantry has one. Over-the-door organizers, mounted spice racks, or wire baskets attached to the back of the door create significant additional storage that’s often completely wasted. Plan for this real estate just like you plan for shelves. Position items on the door that don’t roll or fall when the door opens — flat boxes of foil and wrap, hanging bags of snacks, mounted spice jars all work well in door storage.
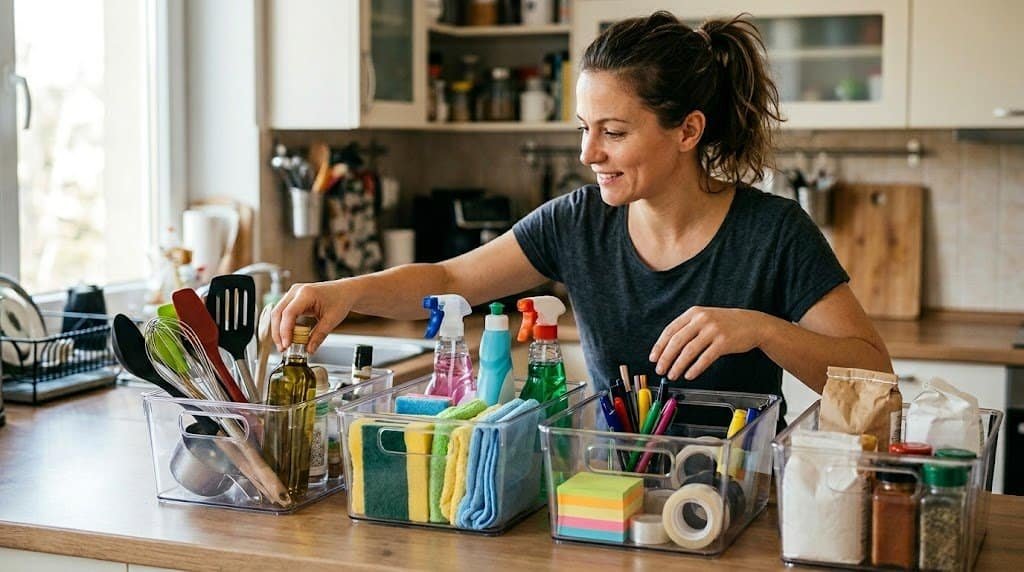
Step 6: Choose the Right Pantry Storage Containers
Containers make or break a small pantry organization system. The right containers maximize space, protect food from pests and humidity, and create the visual clarity that makes finding things easy. The wrong containers waste space, fail to seal properly, or create visual chaos despite your organization efforts.
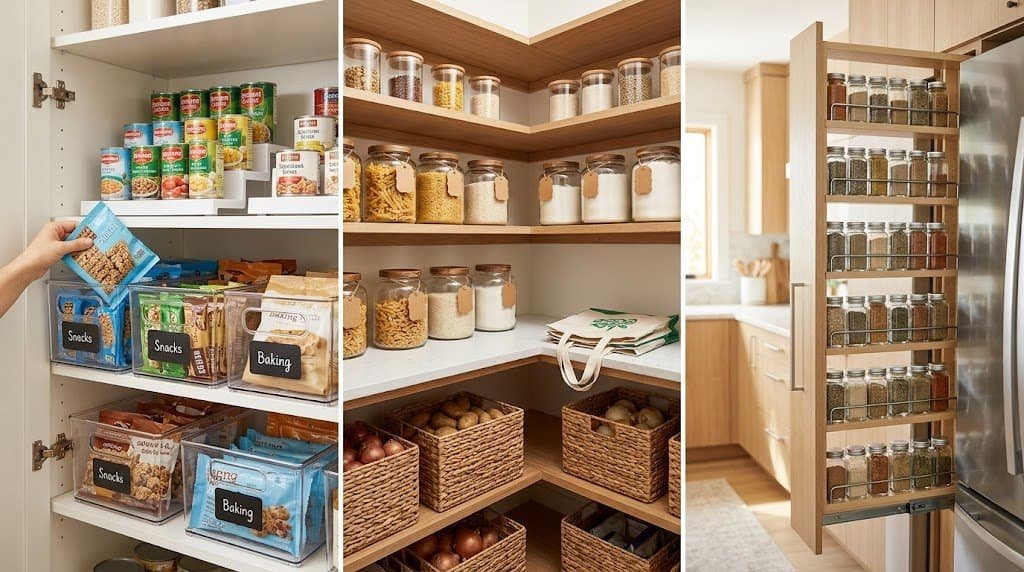
For a small pantry specifically, choose containers that are square or rectangular rather than round whenever possible. Square containers tessellate efficiently against each other, while round containers waste corner space. Clear containers (glass or BPA-free plastic) let you see contents at a glance, which prevents the “what’s in this jar?” problem that plagues canister sets. Stackable designs maximize vertical space, which matters enormously in compact pantries where you’re trying to fit a lot into limited shelf height.
The OXO Pop containers are widely considered the gold standard for pantry storage — airtight, stackable, durable, and available in many sizes. Cheaper alternatives include simple square food storage containers from Target, IKEA, or Walmart that perform nearly as well at a fraction of the price. You don’t need to commit to one brand or style; mixing affordable everyday containers for high-turnover items with nicer containers for items displayed on open shelves works perfectly well.

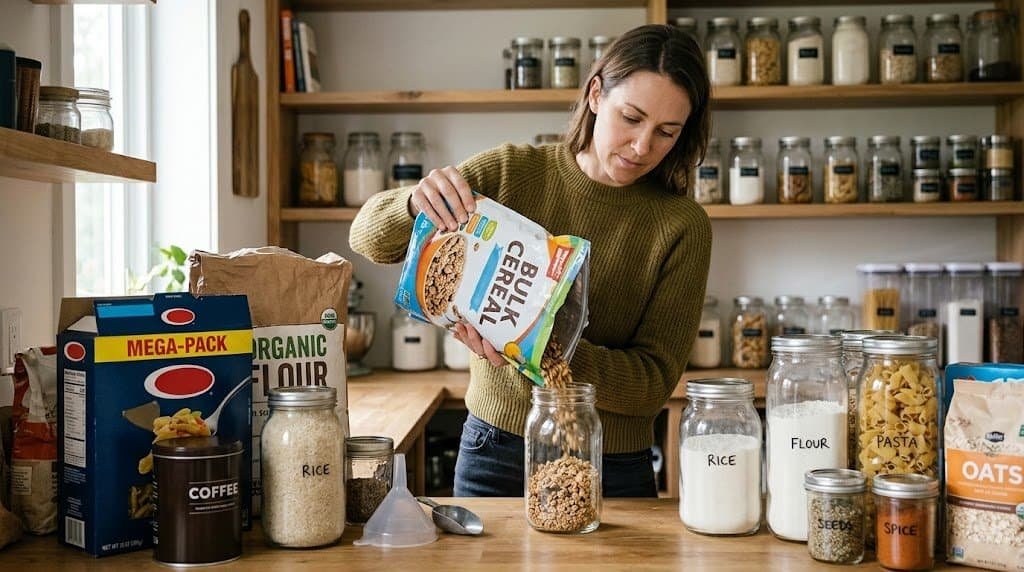
Step 7: Decant Bulky Items Into Better Containers
The single biggest space-waster in most pantries is leaving items in their original packaging. Cereal boxes are mostly empty space. Bags of flour collapse and create awkward shapes that can’t stack. Spice jars from the grocery store are inconsistent sizes. Decanting frequently-used items into uniform containers transforms your storage capacity and visual clarity simultaneously.
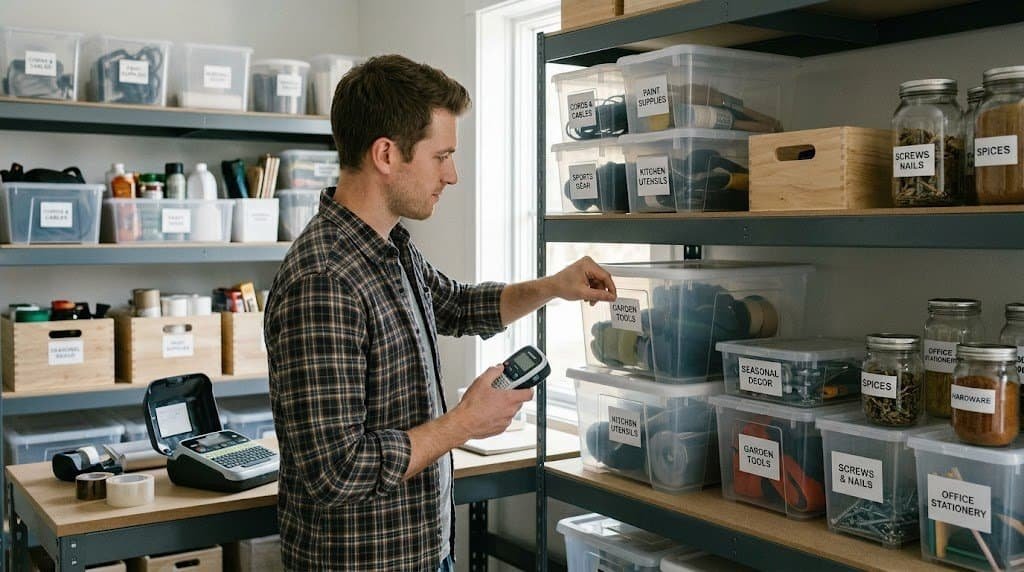
Start with the highest-impact decanting candidates: flours, sugars, rice, pasta, oats, cereal, coffee, baking ingredients, and snacks like crackers or pretzels that lose freshness in their original bags. Transfer each item to an appropriately-sized clear container with a tight-sealing lid. Label each container clearly — even though contents are visible, labels help family members put things back correctly and identify similar-looking ingredients (powdered sugar versus regular sugar, all-purpose flour versus bread flour).
Critical labeling tip: write the expiration date on each container as you decant. Use a small label, a piece of masking tape, or a chalkboard label that you can update each time you refill. Without this date tracking, decanted items can sit forever without anyone realizing they’ve gone stale or expired. Many organized pantry failures trace back to this single overlooked detail.
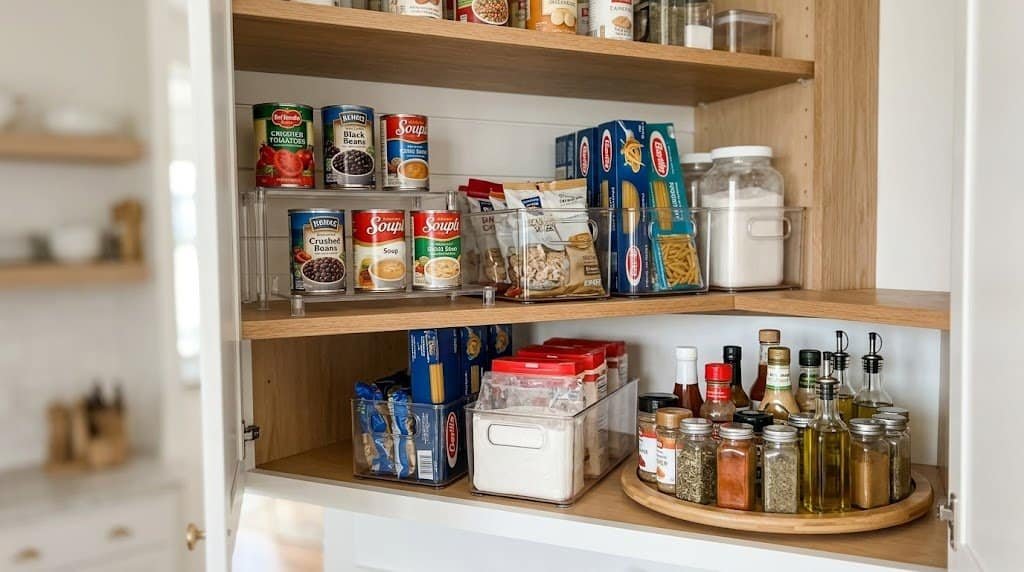
Step 8: Use Risers, Bins, and Lazy Susans
With everything categorized and (largely) decanted, the next layer of pantry shelving optimization comes from using risers, bins, and lazy Susans to maximize your space and accessibility. These tools transform standard shelves into multi-level storage systems that fit far more than basic shelving alone could hold.
Tiered shelf risers (the wire or plastic step-shelves that create three or four levels on a single shelf) are essential for spice cabinets, canned goods, and any category where you need to see everything at once. Place them on shelves storing items of similar size — the stepped design ensures every item is visible rather than hidden behind taller items. Adjustable expandable risers fit different shelf widths, so measure carefully before buying.
Storage bins corral loose items into manageable groups. Use bins for snacks (so individual bags don’t migrate), for baking ingredients (one bin holds all your decorating supplies), for breakfast items, or for any category where individual containerization isn’t practical. Pull-out the entire bin when you need its contents, which makes accessing back-of-shelf items much easier. Lazy Susans work miracles for sauces, oils, and any items where you previously had to remove front-row items to reach back-row items.
Step 9: Implement Smart Door Storage
The inside of your pantry door represents potentially significant storage real estate that most people completely ignore. With a few simple additions, you can transform door space into prime storage for items that are often hard to fit elsewhere. This is one of the most powerful pantry storage hacks for small spaces specifically because it adds capacity without taking up any shelf space.
Over-the-door organizers (the kind used for shoes, repurposed for pantry items) work brilliantly for small packets and pouches: taco seasoning packets, gravy mixes, hot chocolate packets, single-serve oatmeal, tea bags, drink mixes, and similar items that disappear into shelf chaos. The clear pockets keep these small items visible and contained rather than scattered across multiple shelves.
For larger door storage, mount wire baskets, spice racks, or pegboard systems to the back of the door. Mounted systems can hold spice jars, foil and wrap boxes, and even larger items like cleaning supplies if your door is sturdy enough. Just verify your door can handle the weight, and use appropriate mounting hardware for the door material. A heavy-laden door that pulls away from its hinges is no organizational win.
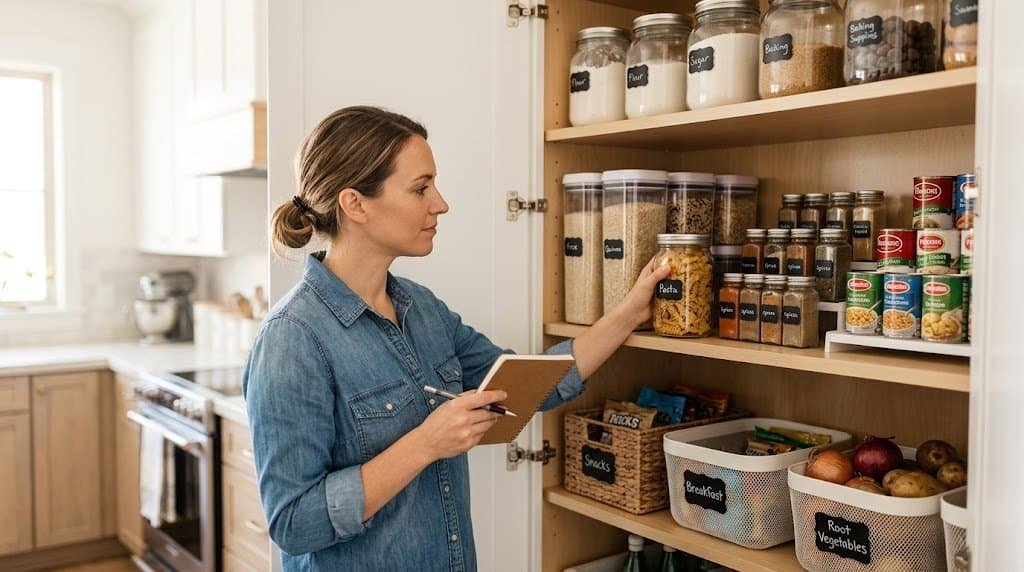
Step 10: Label Everything Clearly
Labels are the difference between an organized pantry that stays organized and one that drifts back to chaos within weeks. Without labels, family members can’t tell which container holds what, items return to wrong locations, and the careful system you built becomes confusing within days. With labels, the system becomes self-maintaining because everyone knows where things go.
Choose a labeling style that matches your pantry’s aesthetic. Chalkboard labels feel rustic and farmhouse-y while allowing you to easily update contents. Printed labels (from a label maker) feel clean and modern. Vinyl letter stickers applied directly to containers feel more permanent and polished. Hand-written labels in a beautiful pen on simple kraft paper labels work beautifully for less-formal pantries.
Beyond labeling individual containers, consider labeling shelves and zones too. A small label or chalkboard sign at the front edge of each shelf indicating “Baking,” “Pasta & Grains,” “Snacks,” etc. helps family members quickly locate categories rather than searching the entire pantry. This zone-labeling is especially helpful for kids who are starting to help with meal prep or for guests who want to assist with a recipe but don’t know where things live.
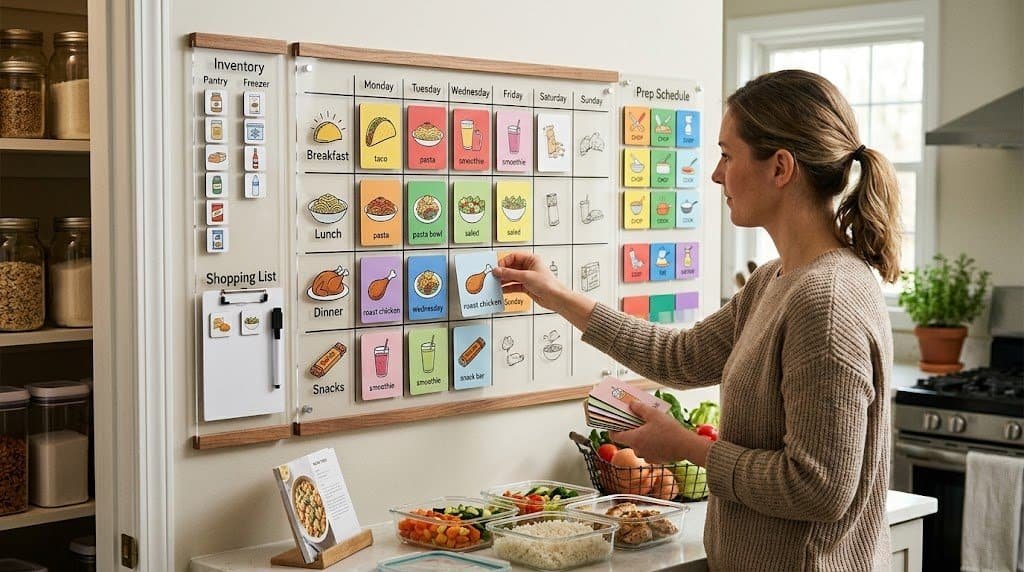
Step 11: Create a Meal-Planning Visibility System
Beyond physical organization, build a system that makes your pantry inventory visible to your meal planning. Many organized pantries fail to deliver their full benefit because the food still gets forgotten despite being beautifully organized. A simple visibility system — physical or digital — connects your pantry contents to your weekly cooking decisions.
The simplest version is a small whiteboard or chalkboard inside the pantry door listing items that need to be used soon. When something is approaching its expiration date or has been sitting unused for too long, write it on the board. Reference this list when meal planning so you build recipes around items that need to be consumed rather than ignoring them until they expire.
For more digital households, apps like Pantry Check, Out of Milk, or even a simple shared note in your phone serve the same function. Take a photo of your organized pantry monthly so you can reference it while grocery shopping to avoid duplicate purchases. The specific tool matters less than the practice of actively connecting your pantry contents to your purchasing and cooking decisions.
Step 12: Establish Maintenance Habits That Actually Stick
The final and most crucial step in small pantry organization is establishing habits that prevent the slow drift back to chaos. Even the most beautifully organized pantry will degrade within months without ongoing maintenance — but the maintenance required is far less than the initial organization, especially when systems are well-designed.
Build a five-minute weekly pantry reset into your routine. Before each grocery shopping trip, spend a few minutes returning anything to its proper location, restocking decanted containers if you have refill stock, and noting items that need to be added to your shopping list. This brief weekly check prevents small disorganization from accumulating into another full reorganization project.
Once a month, do a slightly deeper review. Check expiration dates on items with shorter shelf lives. Review your “use soon” list and adjust meal planning accordingly. Wipe down any shelves that have crumbs or spills before they become harder to clean. Once a quarter, do a more thorough version of the original organization process — empty, clean, edit, and reorganize. This quarterly reset prevents the drift to chaos that affects most pantries within six to twelve months of initial organization

Bonus Tips for Different Pantry Types
Small pantries come in different configurations, and some specific advice applies to specific layouts. Closet pantries (those tall, narrow spaces with multiple shelves at varying heights) benefit most from vertical organization — door storage, tall risers, and multi-tier solutions. Cabinet pantries (single tall cabinets in your kitchen) benefit from pull-out drawers or sliding bins to access deep shelf space without removing everything.
For people with no real pantry — just a few shelves or a single cabinet for dry goods — focus on aggressive editing and aggressive containerization. With limited space, every item must earn its spot, and decanting into space-efficient containers is non-negotiable. Consider whether some pantry overflow can live elsewhere — bulk paper goods in a basement or garage, holiday baking supplies in a separate seasonal storage location, beverages in a specific drinks cabinet. Sometimes “small pantry organization” really means “spreading pantry items intelligently across multiple storage zones.”
For walk-in pantries that happen to be small, treat the space like a tiny store. Position categories logically (related items near each other), use baskets or bins to corral small items into shopping-friendly groupings, and ensure the most-used items are at the easiest-access positions. The store metaphor helps you organize for actual use rather than just for visual appeal.
Final Thoughts
A well-organized small pantry isn’t about Pinterest-perfect aesthetics or expensive matching containers — it’s about creating a system that genuinely supports the way you cook, shop, and live. The most beautiful pantry is meaningless if it doesn’t function in your real daily life, and the simplest organized pantry is invaluable if it does. Focus on function first, and the aesthetics will follow naturally once your system is sound.
Don’t expect perfection in a single weekend project. Small pantry organization is iterative — you’ll discover that some categories need adjustment, that certain containers don’t work as well as you hoped, that some zones get more use than expected. Adapt your system as you learn, and consider it a living organization rather than a finished project. Each adjustment moves you closer to a pantry that’s truly tailored to your household.
The hours you invest in organizing your pantry pay back daily for years. Faster meal prep, less food waste, easier grocery shopping, reduced stress when cooking, and the simple pleasure of opening your pantry to a space that feels cared for — these small daily benefits add up to significant quality-of-life improvement. The investment is absolutely worth making, even when the project feels overwhelming in the middle of it.
Loved these ideas? Save this pin to your “Home Organization Hacks” board and share it with anyone planning a pantry refresh!
Read More: 20 Modern Farmhouse Kitchen Decor Ideas That Will Completely Transform Your Space


