
Looking for DIY outdoor bar ideas that turn your backyard into the ultimate summer entertaining destination? A dedicated outdoor bar transforms how you host — suddenly your gatherings have a clear gathering point, drinks flow effortlessly, and you spend more time enjoying your guests instead of running back and forth to the kitchen. The best part is that you don’t need to spend thousands of dollars or hire a contractor to build something beautiful. With a weekend, some basic tools, and the right inspiration, you can create a backyard bar setup that genuinely competes with your favorite restaurant patio.
In this guide, you’ll discover 20 creative DIY outdoor bar projects ranging from simple bar carts you can build in an afternoon to full-scale tiki bars and built-in stone counters that become permanent backyard features. You’ll find ideas for every skill level and budget — from no-build bar stations using furniture you already own, to weekend DIY projects requiring basic carpentry, to ambitious builds that become the pride of your entire neighborhood. Each idea includes the kind of practical details that turn an inspiration photo into something you can actually build this summer.
Pin this post to your “Easy DIY Home Projects” board so you can come back to it when you’re ready to start building!
Why Building Your Own Outdoor Bar Beats Buying One
Walking through any outdoor furniture store, you’ll quickly notice that pre-made outdoor bars start at $400 for the most basic models and easily exceed $2,000 for anything substantial. They’re often made from cheap materials, designed without your specific space in mind, and they look exactly like every other bar your neighbors might have. Building your own outdoor drink station completely changes that equation. You get something custom-sized, custom-styled, and significantly more affordable, plus the genuine pride of pointing at your bar and saying “I built that.”
The other huge advantage of DIY is that you can incorporate exactly the features you actually use. Maybe you need a built-in ice bin because you mostly serve cocktails. Maybe you need extensive bottle storage because you collect interesting spirits. Maybe you need a refrigerator slot for craft beer or a sink for easy cleanup. Pre-made bars give you whatever the manufacturer decided was generic enough to sell to everyone — DIY gives you exactly what fits your hosting style. This functional customization is impossible to replicate with a purchased bar.
Building your own backyard bar setup also lets you match your existing outdoor aesthetic perfectly. If your patio is rustic farmhouse, you can build a reclaimed wood bar that ties everything together. If your space is modern and clean, you can build a minimalist concrete-and-steel bar that complements your other furniture. The harmony that comes from custom-built features makes your outdoor space feel professionally designed rather than assembled from a catalog. And it costs less while delivering more.
1. Reclaimed Pallet Bar with Bottle Storage
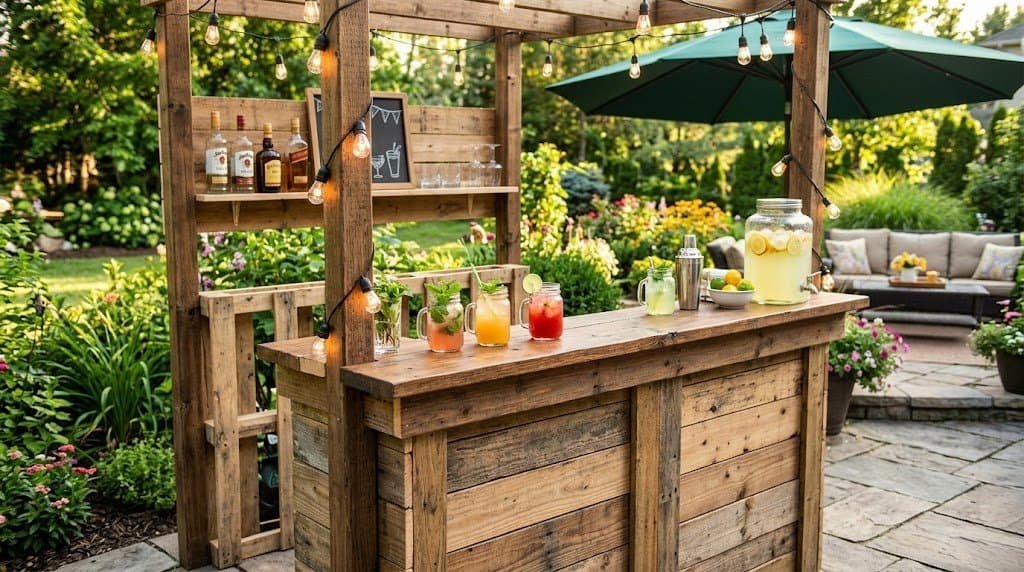
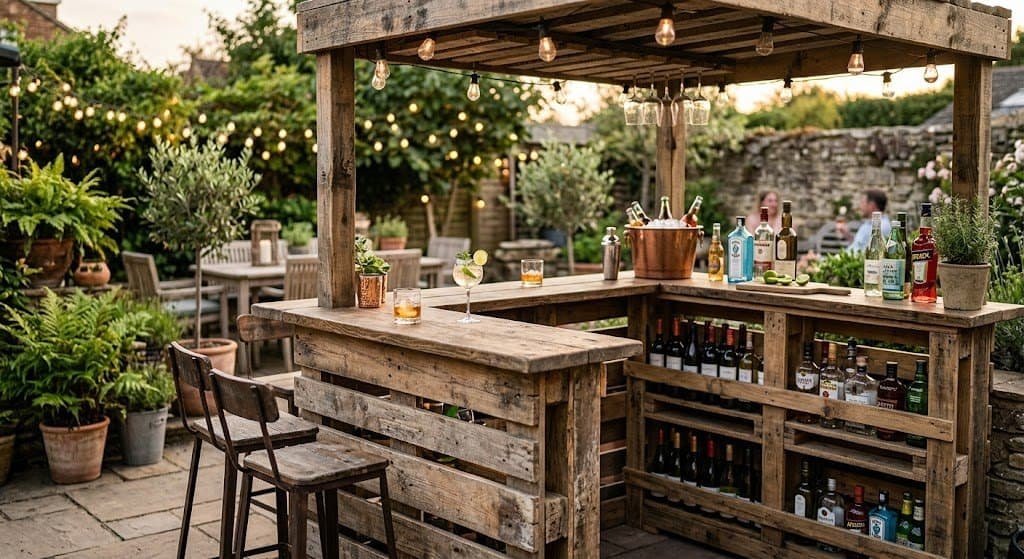
The pallet bar is the gateway DIY outdoor bar project — the one that thousands of people have successfully built as their first major outdoor project, and for good reason. Free or nearly free pallets, a few hours of work, basic tools, and you end up with a genuinely impressive bar that has authentic rustic character. The pallets themselves provide built-in bottle storage in their slats, which solves one of the biggest design challenges of any outdoor bar.
Start with two heat-treated pallets in good condition. Stand one upright as the front of your bar, and use the second one cut horizontally to create the top counter and a lower shelf inside. Reinforce the corners with 2×4 lumber for stability, then sand the entire surface to remove splinters. The natural slats in the pallets perfectly hold wine bottles horizontally on the shelves, and the front-facing slats can hold glassware or hanging hooks for bar tools.
Finish the wood with an exterior-grade stain or polyurethane to protect it from weather, choosing a color that complements your outdoor space. A light whitewash gives a coastal or farmhouse feel, while a dark walnut stain looks more modern and refined. Total cost typically runs under $75 if you can source pallets cheaply, and the entire build takes one weekend even for beginners.
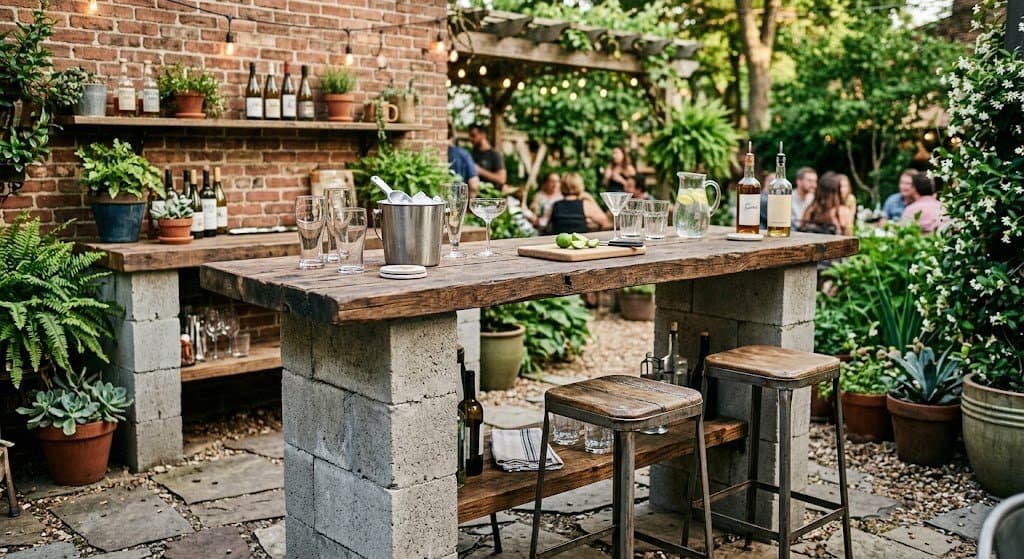
2. Cinder Block Outdoor Bar
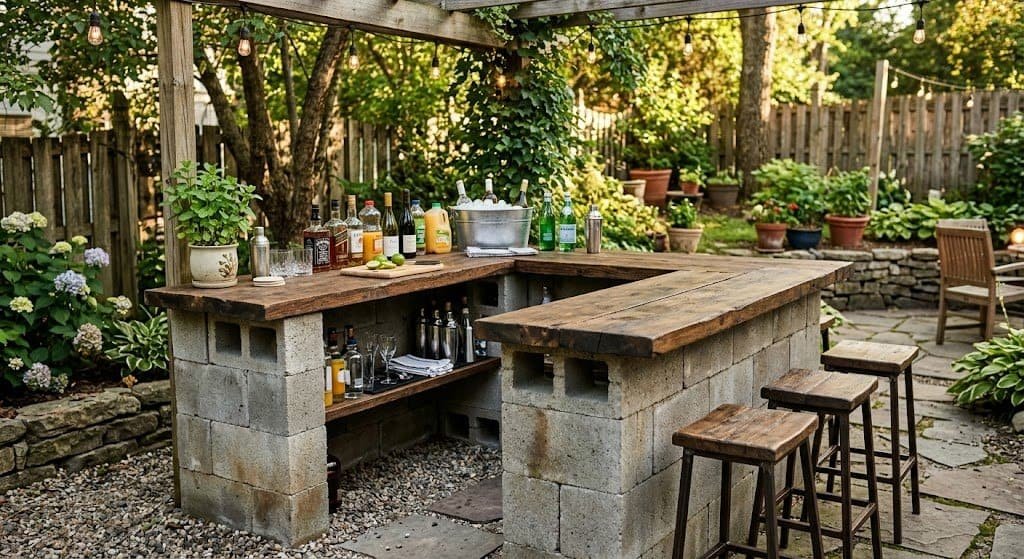
Cinder blocks have become surprisingly trendy in DIY outdoor builds because they’re incredibly affordable, structurally sound, and genuinely modern-looking when styled correctly. A cinder block bar is essentially indestructible, requires zero specialized tools or skills to build, and creates a sturdy foundation that will outlast any wood structure. It’s the perfect project for people who want a permanent backyard fixture without the complexity of traditional construction.
Stack standard 8-inch cinder blocks in a U-shape or L-shape configuration to create your bar’s base structure. Use construction adhesive between blocks for stability if you want a permanent build, or simply stack them dry if you want flexibility to reconfigure later. Top the blocks with a substantial wood plank or a piece of stone slab to create the bar surface — butcher block, treated lumber, or even a polished concrete slab all work beautifully and create dramatic contrast against the gray blocks.
Style the bar by filling the open holes in the cinder blocks with succulents, herbs, or LED candles for ambient lighting. Wrap the front of the bar with rope, leather strips, or fabric for visual texture, or paint the blocks in matte black or warm white for a more refined finished look. The total cost typically lands between $60 and $150 depending on materials, making this one of the most budget-friendly substantial bar builds possible.
3. Built-In Outdoor Bar Counter with Storage
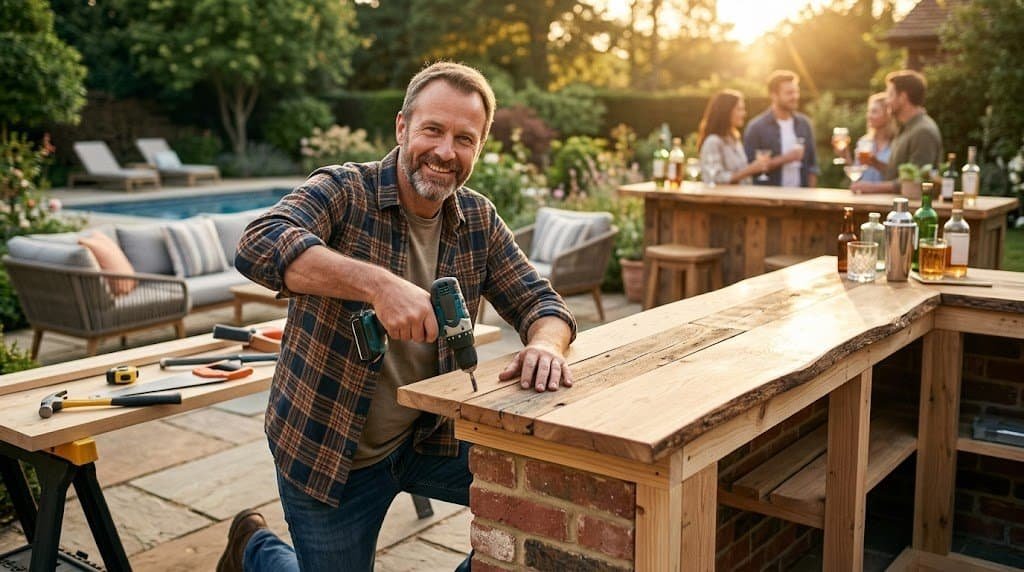
For homeowners ready to commit to a permanent backyard feature, a built-in outdoor bar counter delivers the most professional-looking results of any DIY bar project. This is the kind of bar that becomes a real selling point for your home and dramatically increases the perceived value of your backyard. It requires more skill and time than other projects on this list, but the payoff lasts for decades.
Frame the bar structure using pressure-treated 2×4 lumber, building a basic rectangular box approximately 42 inches tall and 24 inches deep. The length depends on your space — anywhere from 5 to 12 feet works beautifully. Cover the front and sides with cedar planks, stone veneer, or weatherproof composite siding to match your home’s aesthetic. Top with a substantial bar surface like quartz, granite, treated wood, or polished concrete — the countertop choice largely determines how high-end the finished bar feels.
Inside the structure, build adjustable shelving for liquor bottles, mixers, and glassware. Leave space for a small refrigerator if you want full functionality, and consider adding a built-in ice bin or even a small sink with running water if you’re willing to handle the plumbing. While the upfront cost is higher (typically $400 to $1,200 depending on materials and size), the result is a permanent backyard centerpiece that genuinely transforms your home.
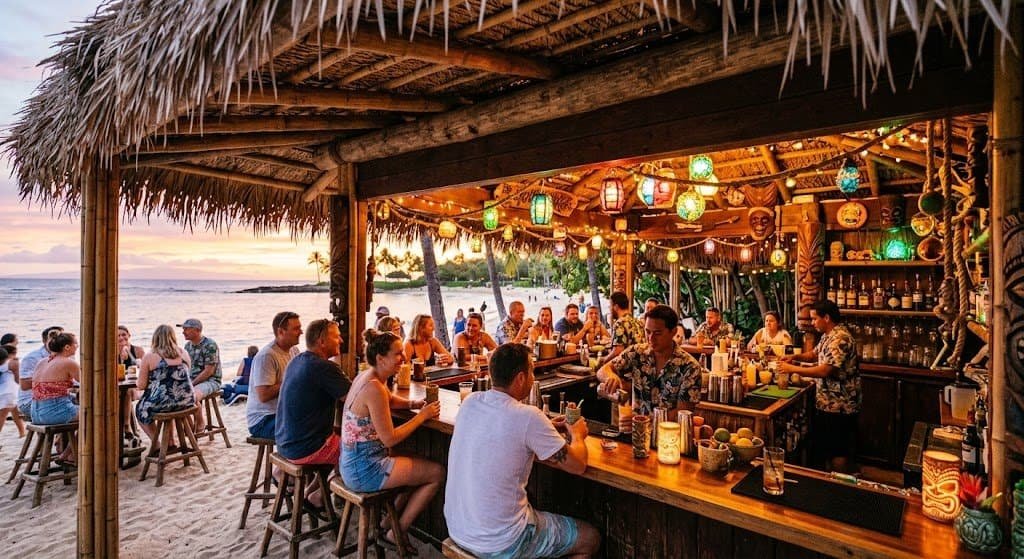
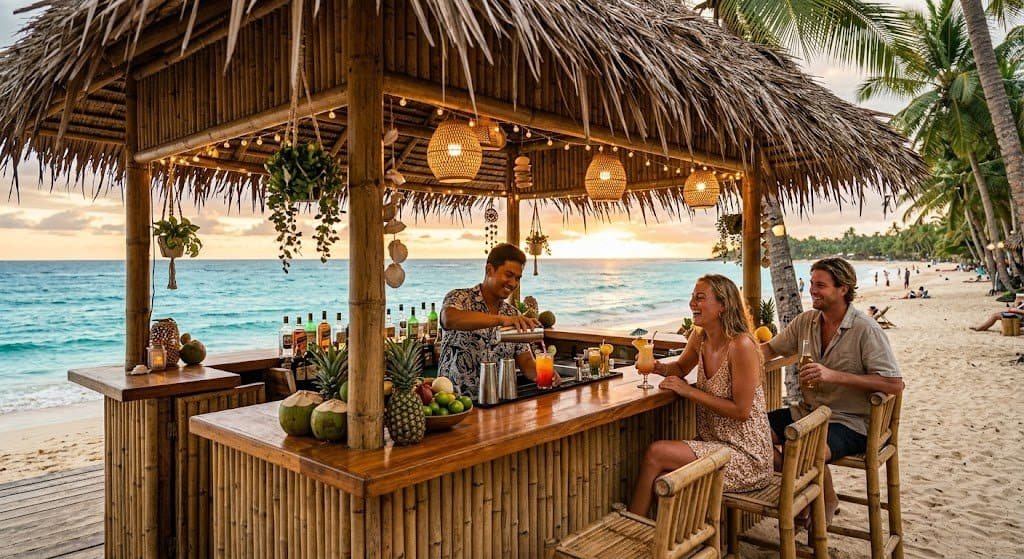
4. Tiki Bar with Thatched Roof
A genuine tiki bar with a thatched roof brings instant tropical vacation energy to any backyard. There’s something about the combination of bamboo, thatched palm fronds, and warm wood that makes guests feel like they’ve stepped into a Caribbean resort the moment they walk up. Tiki bars are one of the most fun and theatrical DIY outdoor bar projects you can take on, and they always become the most-photographed feature in any backyard.
Build the basic bar structure from cedar or treated lumber, creating a rectangular bar with bamboo poles attached to the front for that distinctive tiki look. Add corner posts that extend up about 7 feet, then build a simple peaked roof frame on top. Cover the roof with thatched palm panels (available at most home improvement stores or specialty tropical retailers) for the iconic tiki appearance. The thatched roof provides real shade plus all the visual atmosphere.
Decorate with bamboo pole accents, tiki torches at the corners, hanging glass float lights, and a bar mat made from natural seagrass. Stock the bar with tropical glassware, a bowl of fresh limes, and a few bottles of rum to complete the experience. Tiki bars typically cost $200 to $500 to build depending on size and materials, and they instantly become the most distinctive feature of any backyard.
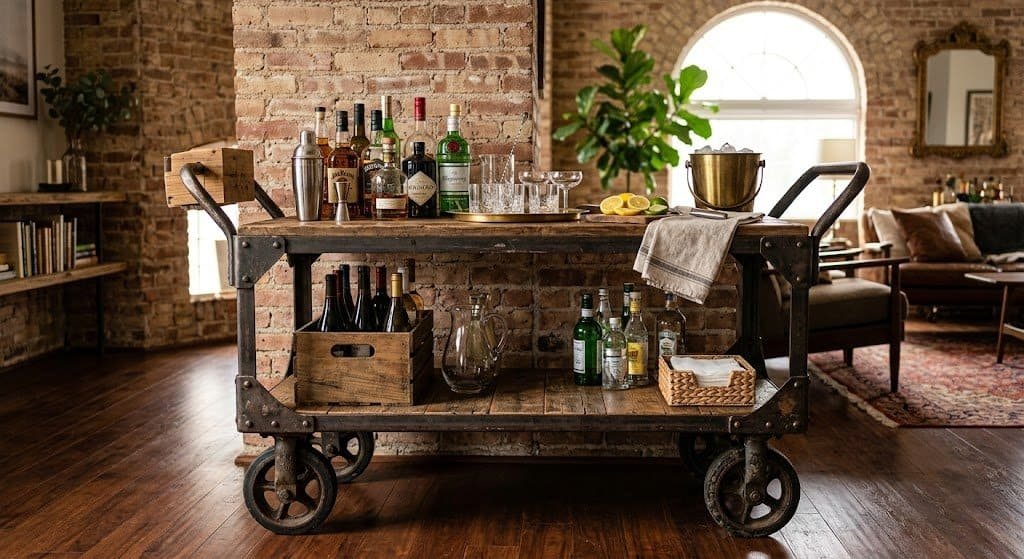
5. Mobile Bar Cart Made from a Repurposed Cart
If a permanent built-in bar feels like too much commitment, a mobile bar cart gives you all the entertaining functionality with the flexibility to move it anywhere — and it can be tucked away in the garage during winter months. Building one from a repurposed garden cart, vintage tea trolley, or even an old wooden ladder costs significantly less than buying a pre-made bar cart, and the result has far more character.
Start with a sturdy two or three-tier cart frame, ideally with wheels that lock in place. Wood carts can be sanded and refinished in your preferred stain or paint color. Metal carts can be spray-painted in matte black, brass, or any color that complements your space. Add wood shelves if needed to create flat surfaces for glassware and bottles. The whole transformation usually takes a single weekend and costs under $100 in supplies if you start with an existing cart.
Style the finished bar cart with a few essential elements: a small ice bucket on the top tier, glassware grouped together, your favorite spirits as the back row, mixers and tools on the middle shelf, and larger items like wine bottles or a champagne bucket on the bottom. Add a small vase of fresh flowers, a citrus cutting board, and a folded bar towel for that styled look. Roll the cart out for parties and tuck it away when not in use.
6. Concrete Block and Wood Plank Bar
This minimalist build combines the industrial appeal of concrete with the warmth of natural wood for a stunningly modern outdoor bar that looks like it cost five times what you actually spend. The construction is so simple it can be completed in a single afternoon by complete beginners, yet the finished result rivals professionally designed restaurant patios.
Stack concrete blocks (regular gray or painted in matte black) in two pillars at either end of where you want your bar. Lay a thick wooden plank across the top to serve as the bar surface — a single substantial piece of timber, ideally 2 to 3 inches thick and 8 to 10 feet long, creates the most dramatic effect. Reclaimed barn wood looks especially good, but new lumber finished with a rich stain works beautifully too. The contrast between heavy concrete and warm wood is what makes this design feel intentional rather than improvised.
The simplicity of this bar is its biggest strength. There’s no front facing the guests, no built-in storage, just a clean horizontal surface where you arrange everything beautifully each time. Style with a few statement bottles, beautiful glassware, fresh herbs in small vases, and good lighting overhead. The whole project costs $80 to $200 and takes maybe two hours of actual work.
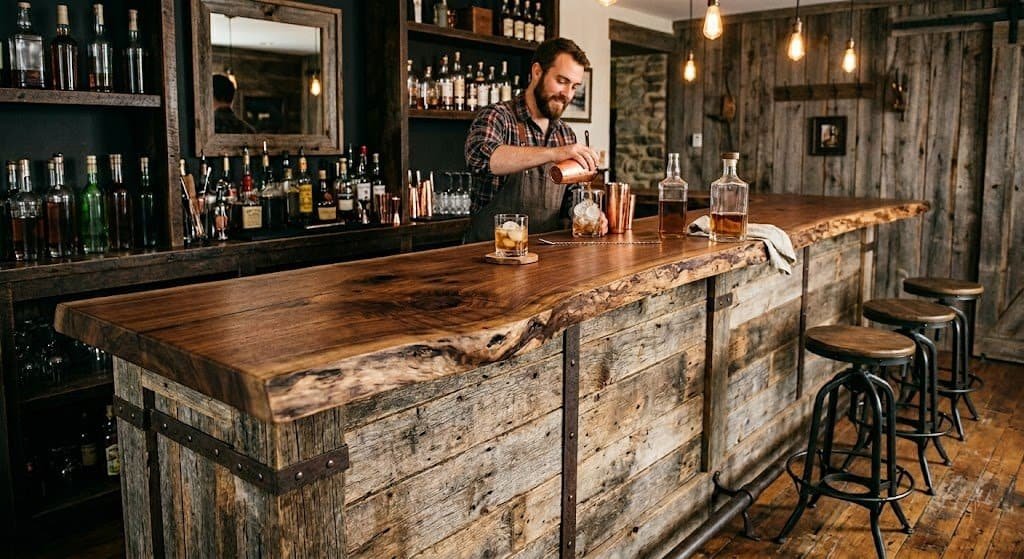
7. Rustic Barn Wood Bar with Live Edge Top
For homeowners with access to reclaimed wood — either purchased from a salvage yard or scavenged from old barn renovations — a rustic barn wood bar delivers character that no new lumber can match. The combination of weathered, knotted wood with a stunning live-edge slab top creates the kind of one-of-a-kind feature piece that becomes a talking point at every gathering.
Build the bar’s base structure from reclaimed barn wood planks, embracing the rough, irregular character of the wood rather than trying to make it look new. The imperfections — knots, weathering, old nail holes, color variations — are exactly what make this style work. Top the structure with a substantial live-edge wood slab, which you can sometimes find at lumber yards, woodworking shops, or even sourced from local sawmill operations.
Finish the entire piece with multiple coats of exterior polyurethane to protect the wood while preserving its natural character. The finished bar feels like it has stories, history, and authenticity that store-bought furniture can never replicate. Costs vary widely depending on wood sourcing — anywhere from $150 if you can scavenge materials to $600 if buying everything from specialty suppliers.
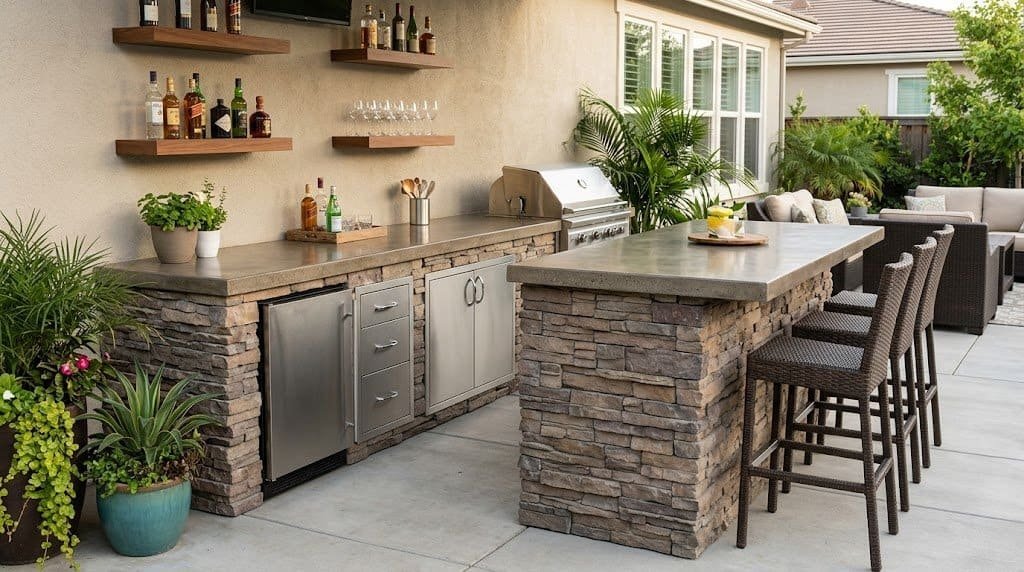
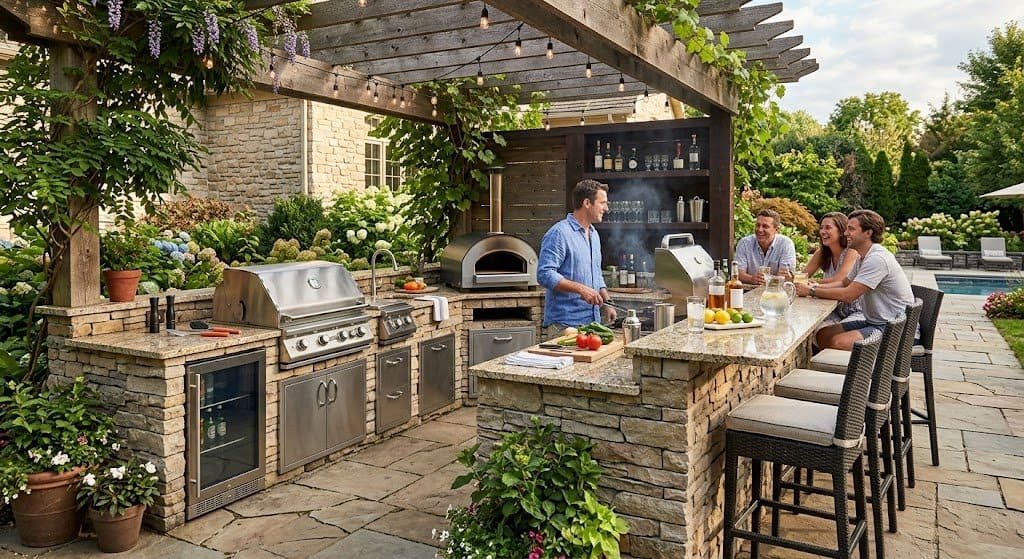
8. Outdoor Kitchen Bar Combination
If you cook outdoors regularly, building a combination outdoor kitchen and bar maximizes the functionality of a single project. This setup creates a complete entertainment hub where you can cook, mix drinks, and serve guests all from one organized station — basically your own restaurant in the backyard.
The structure is essentially an extended bar counter that incorporates space for a grill, a small refrigerator, prep area, and bar service. Build the base from concrete block or treated lumber framing, then face it with stone veneer, brick, or weatherproof composite siding for a polished look. Top with a heat-resistant surface like granite or quartz that handles both food prep and bar service.
Lay out the workspace thoughtfully: grill on one end, prep counter and sink in the middle, bar service area on the opposite end. Install proper LED lighting underneath the counter overhang for evening visibility. While this is one of the more ambitious projects on the list (typically $800 to $2,500 depending on appliances and finishes), it transforms outdoor entertaining from an occasional event into a primary lifestyle.
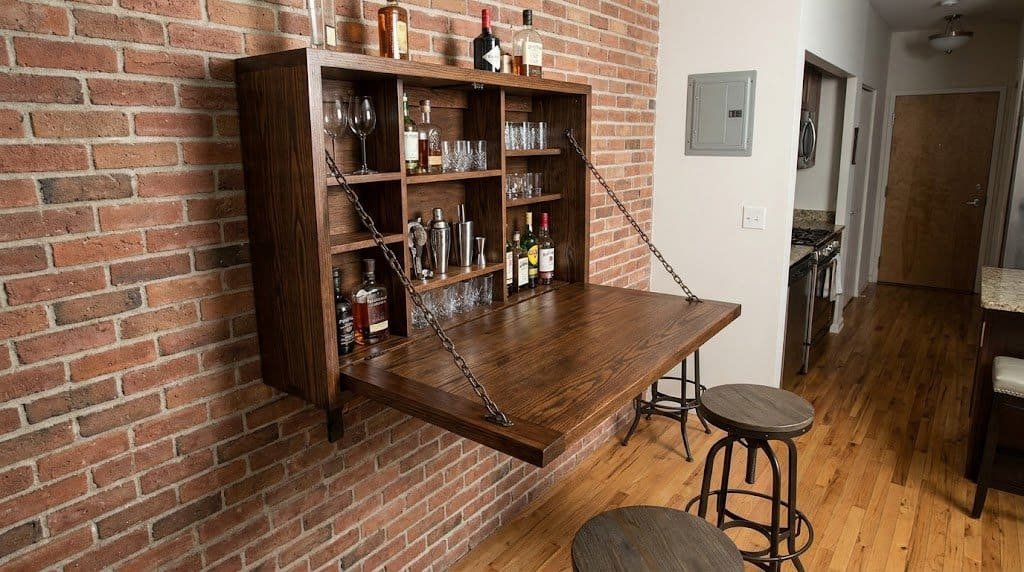
9. Folding Wall-Mounted Bar
For small patios, balconies, or condo backyards where space is at a premium, a folding wall-mounted bar gives you full bar functionality that disappears completely when not in use. The bar folds up against the wall when retracted, taking up only inches of space, then folds down to create a substantial bar surface for entertaining.
Build the bar from a piece of substantial wood — at least 1.5 inches thick and as long as your space allows. Attach it to the wall using heavy-duty drop-down brackets that lock securely when extended and fold flat against the wall when collapsed. Add small folding legs at the front edge for extra support when extended. Apply weatherproof finish in your color of choice.
When folded up, decorate the wall-facing side with a chalkboard surface for drink menus, hooks for hanging bar tools, or built-in bottle holders. When folded down for use, the bar provides a substantial work surface plus the folded-up storage becomes the visible back wall behind the bar. This clever space-saving design typically costs $80 to $150 to build and gives small spaces full bar functionality.
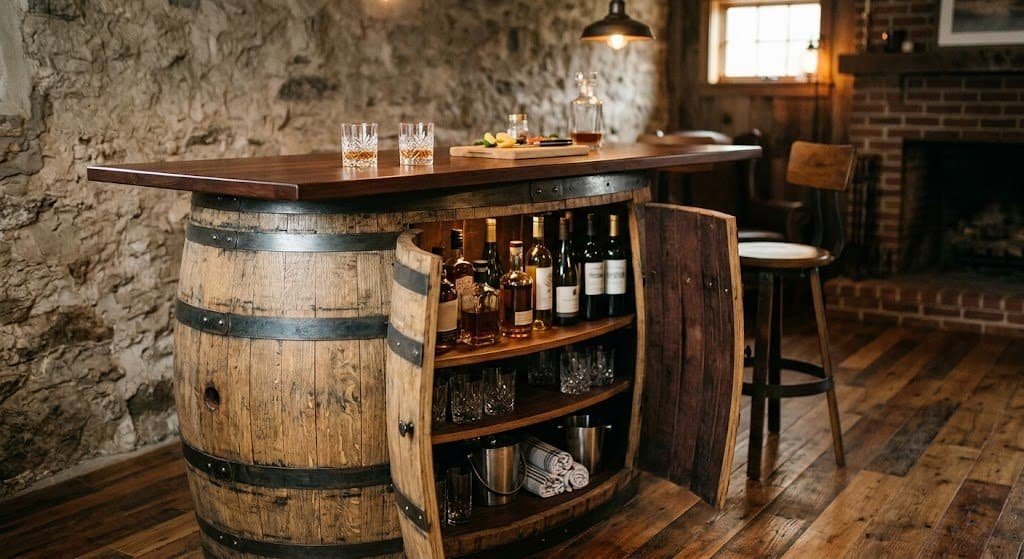
10. Wine Barrel Bar Conversion
A whiskey barrel or wine barrel converted into an outdoor bar is one of the most photogenic builds possible, instantly creating the kind of statement feature that becomes the focal point of any backyard. The naturally curved silhouette, weathered wood character, and connection to drinking history all combine into something that feels far more sophisticated than its DIY origins.
Find a real used wine barrel from a winery, online retailer, or salvage source — you want a genuine barrel, not a fake reproduction. Cut a vertical opening in one side to create a doorway for accessing inside storage, or simply use the top as a small round bar table if you prefer a simpler approach. Add interior shelving for bottles and glassware, then top with a custom round wood top that matches the barrel’s curve.
Decorate by hanging string lights overhead, placing bar stools that complement the rustic feel, and stocking with appropriate spirits — bourbon and whiskey collections look especially fitting in a converted barrel. Total cost runs $200 to $400 depending on barrel sourcing, and the result is genuinely one-of-a-kind. Few backyard features generate more compliments and curiosity from guests.
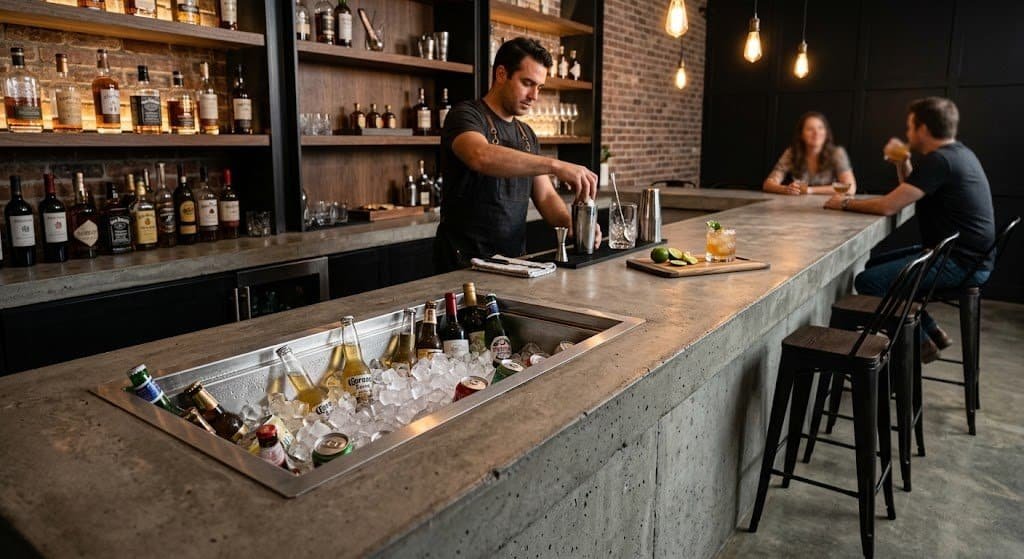
11. Modern Concrete Bar with Built-In Cooler
Polished concrete has become one of the most desirable materials in modern outdoor design, and a DIY concrete bar with an integrated cooler combines style and function in a single dramatic package. The smooth gray surface contrasts beautifully with planted greenery and warm wood accents, creating a bar that feels architectural rather than improvised.
Build the bar’s structural frame from treated lumber, sized to fit a rectangular ice cooler or galvanized trough that will be embedded in the top surface. Cover the structure with concrete countertop mix, using forms to create clean edges and a smooth finished surface. Once cured, polish the concrete to a smooth matte finish. The cooler insert provides cold drink storage that doubles as an ice bath for chilled wine or beer.
The contrast between hard, smooth concrete and the practical functionality of the embedded cooler creates a genuinely sophisticated bar that feels like it belongs in a high-end restaurant patio. Style minimally with quality glassware, a few sculptural bottles, and a single statement plant. Costs typically run $250 to $500 depending on size and finish details.
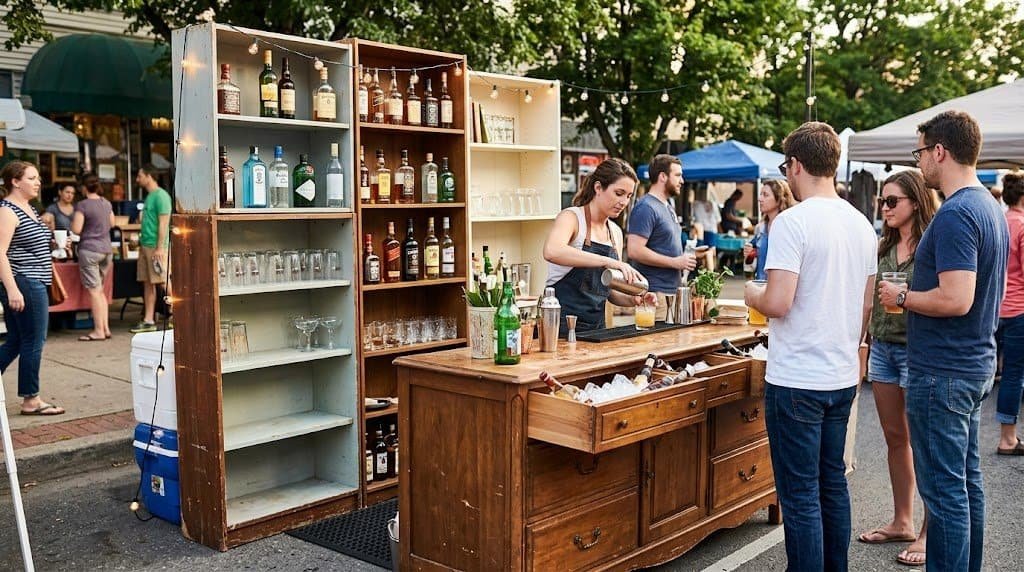
12. Repurposed Dresser or Buffet Bar
Old dressers, buffets, and credenzas being given away on Facebook Marketplace or sitting in thrift stores can transform into stunning outdoor bars with a little weekend work. This approach combines budget-friendliness with genuine character — old furniture has solid construction and interesting details that new furniture rarely matches.
Find a sturdy wood dresser or buffet with good bones, ideally with multiple drawers and shelves. Sand the entire piece thoroughly, then apply outdoor-grade primer followed by exterior paint or stain. The drawers become natural storage for glassware, bar tools, and napkins, while the open shelves display bottles and decanters beautifully. Add a piece of weather-resistant material like sealed wood or stone to the top surface to protect against drink spills.
Style the finished piece by removing some drawers entirely to create open display shelving, adding wallpaper or contrasting paint inside the open compartments, and installing decorative hardware that matches your aesthetic. The whole transformation usually costs $50 to $150 if you find an inexpensive starting piece, and the result has character that mass-produced bars simply can’t replicate.

13. Tropical Bamboo Bar
Bamboo bars deliver maximum tropical resort feel with surprisingly modest construction effort. The natural texture of bamboo, the warm tan color, and the inherent beach-vacation associations all combine into something that immediately transports your backyard to a beachside cabana. This is one of the most aesthetically distinct DIY bar styles you can build.
Construct the basic bar frame from standard treated lumber, then attach split bamboo panels to all visible surfaces — front, sides, and even wrapping the legs. Use whole bamboo poles as decorative accents at the corners. Cover the bar top with a piece of stained wood that contrasts with the lighter bamboo, or top with woven bamboo mats sealed with polyurethane for an even more authentic tropical feel.
Decorate with bamboo bar stools, hanging fishing net details overhead, glass float lights, and tropical accents like potted palms nearby. Add tiki torches at either side for evening atmosphere. The bamboo materials add a very specific tropical character that’s hard to achieve any other way, and the total project usually runs $150 to $350 depending on bar size and bamboo sourcing.
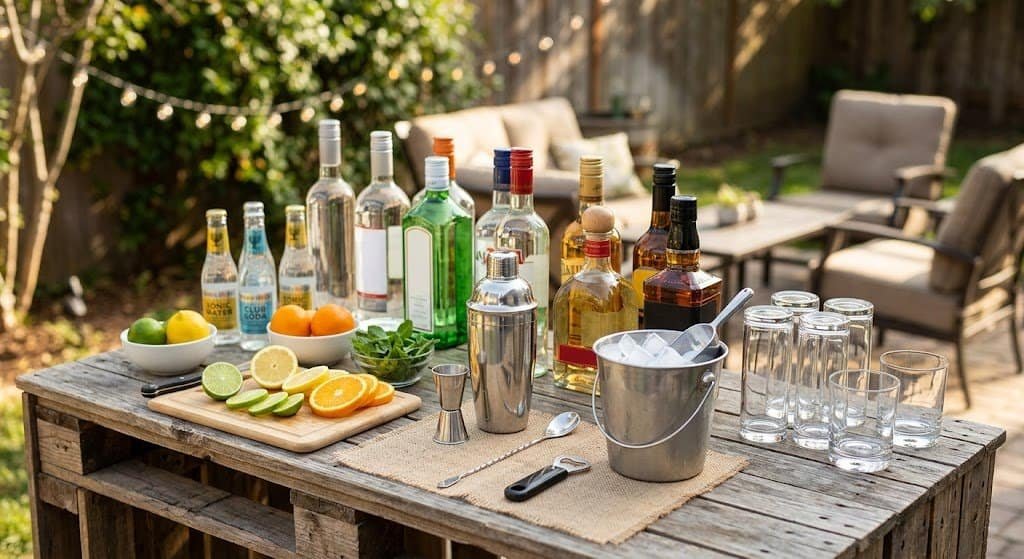
14. Pop-Up Bar Using Existing Furniture
Not everyone wants to commit to building a permanent bar structure. A pop-up bar setup using furniture you already own creates instant entertaining functionality without any actual building. This approach is perfect for renters, anyone testing out outdoor entertaining before committing to bigger projects, or hosts who only need a bar setup occasionally.
Start with a sturdy console table, dresser, sideboard, or even a wide coffee table elevated on bricks. Add a removable bar mat or runner across the top surface to protect against spills and signal “this is a bar.” Layer your bar essentials: an ice bucket on one end, glassware grouped together, bottles arranged by category, mixers within reach, and bar tools neatly displayed.
The styling and arrangement makes this work. Add a small chalkboard sign with the night’s signature drink, fresh garnishes in small bowls, a small flower arrangement, and good lighting overhead. Done well, a pop-up bar looks just as intentional as a permanent build — and the entire setup can be packed away the next morning when you don’t need it. Total cost is essentially zero if you use existing furniture.
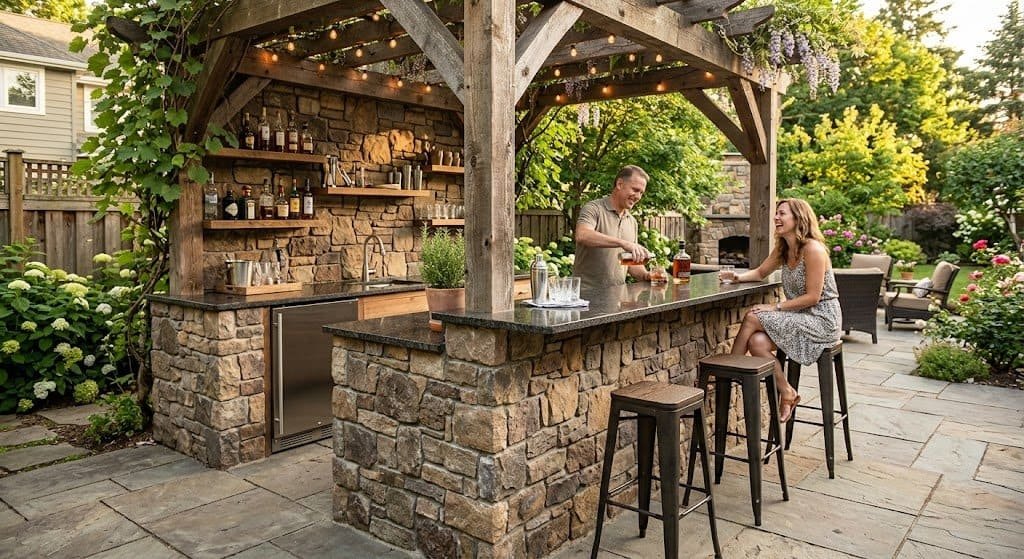
15. Stone Veneer Outdoor Bar
If you want a permanent backyard bar that looks built-in by professionals, applying stone veneer to a basic wood-frame structure delivers professional results at DIY prices. The finished piece looks like it was hand-built by a stonemason, but the actual work is much simpler than it appears once you understand the basic technique.
Build a basic rectangular frame from treated lumber, sized for your space and intended functionality. Cover the frame surfaces with cement backer board to create a solid surface for the veneer. Apply stone veneer panels (available at most home improvement stores) using construction adhesive and mortar, working from bottom to top in horizontal rows. Top the bar with a substantial granite, quartz, or thick wood surface for contrast.
The visual impact of stone veneer is dramatic — the bar suddenly looks like a permanent architectural feature rather than a DIY project. Add accent lighting underneath the counter overhang to highlight the stone texture, and style with high-end bar accessories that match the elevated aesthetic. Project cost typically runs $300 to $700 depending on size and stone choice.
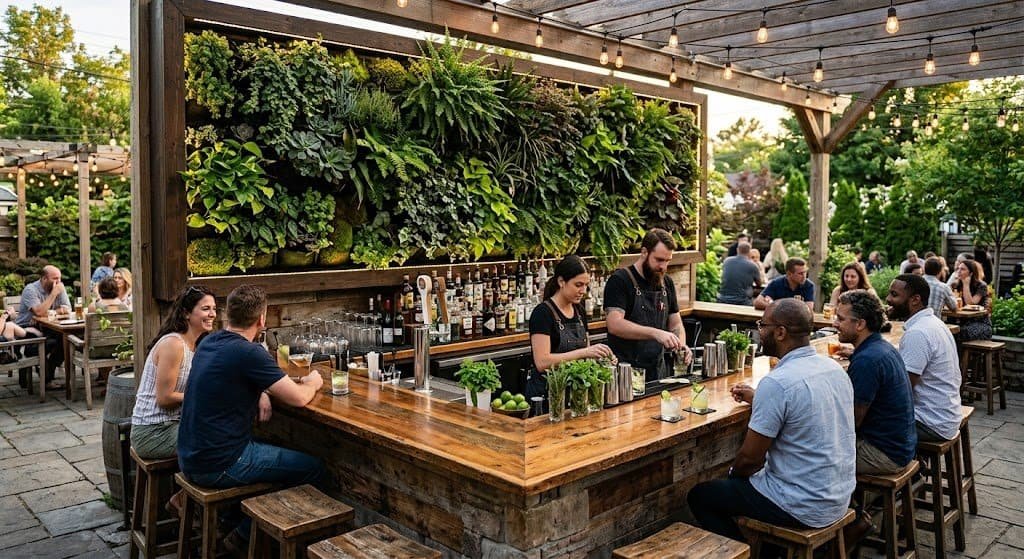
16. Outdoor Bar with a Living Plant Wall
Combining a functional bar with a living plant wall creates one of the most Instagram-worthy backyard features possible. The lush green backdrop behind the bar transforms ordinary entertaining into something that feels distinctly upscale, and the plants soften the hard edges of bar construction beautifully.
Build a basic outdoor bar structure with a tall back wall extending several feet above the bar surface. Cover the back wall with a vertical garden system (commercially available kits make this surprisingly easy) or build pocket planters from recycled wood. Plant the wall with a mix of trailing plants, succulents, herbs, and small flowering plants for visual variety and texture.
The herbs are especially clever — fresh mint, basil, rosemary, and thyme growing right behind the bar provide instant garnishes for cocktails, doubling the wall’s purpose from purely decorative to genuinely useful. Add accent lighting to highlight the plants in the evening, transforming the wall into a glowing feature after dark. Costs vary based on plant choices but typically run $250 to $600 for the full setup.
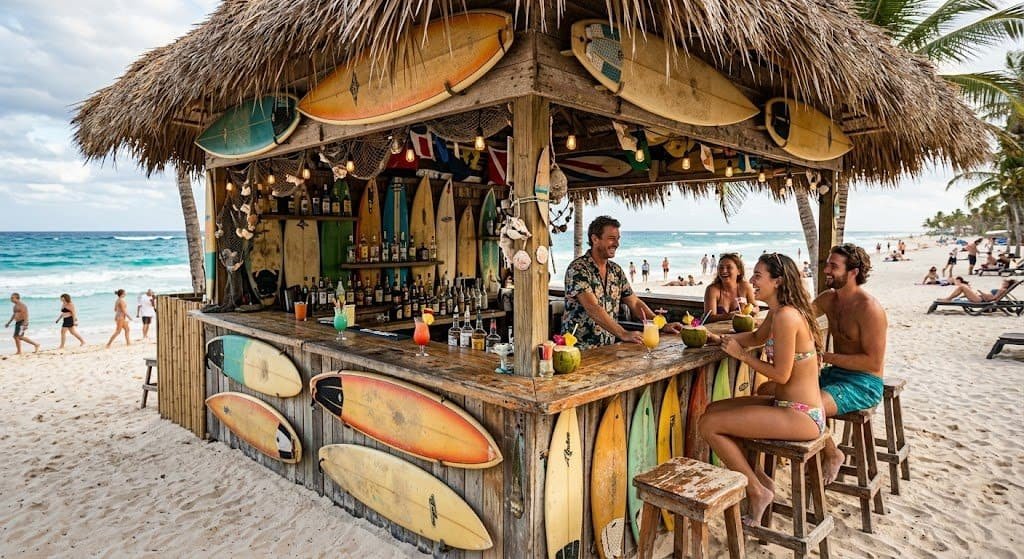
17. Beach-Themed Surfboard Bar
A surfboard repurposed as a bar top creates one of the most fun and conversation-starting backyard features possible. The unique shape, the pop of color, and the obvious beach-vacation association combine into something that immediately signals “this is going to be a fun party.” It’s particularly perfect for backyards near the ocean or for surfing enthusiasts who want to bring that lifestyle home.
Source a vintage or damaged surfboard from a local surf shop, online classifieds, or thrift stores. Damaged boards that aren’t water-worthy anymore are perfect for this project and usually available cheap. Mount the board horizontally on a sturdy base — wooden sawhorses, metal pipes, or built-in supports all work depending on your aesthetic. Seal the top surface with polyurethane to protect it from spills and weather.
Style around the surfboard bar with bamboo elements, beach-themed glassware, tropical drinks, and string lights overhead. Add a smaller surfboard mounted on the wall behind the bar as a decorative feature, or hang an old tropical print as a backdrop. The total project cost depends almost entirely on the surfboard sourcing — anywhere from $50 if you find a free damaged board to $400 for a beautiful vintage piece.
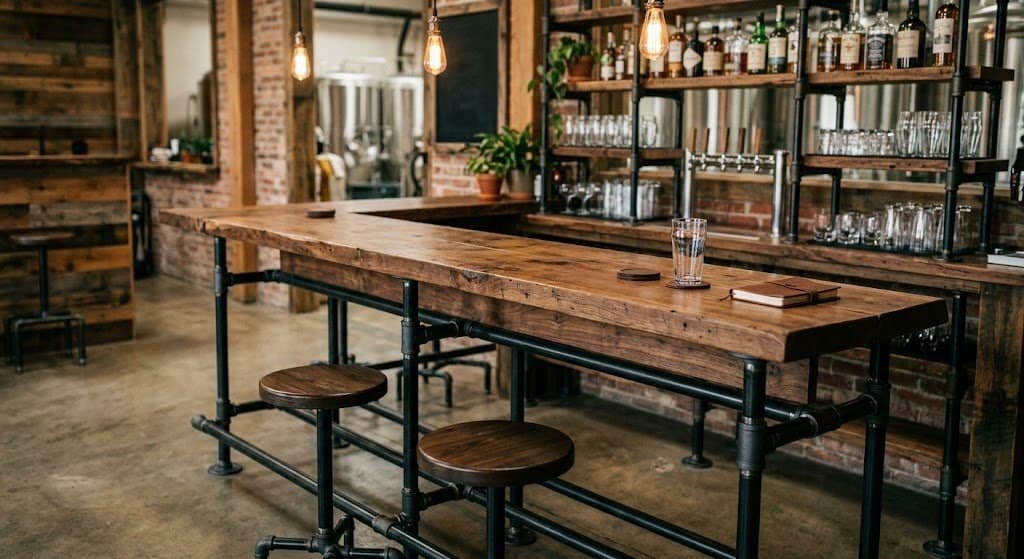
18. Industrial Pipe and Wood Bar
Industrial design has dominated interior trends for years, and bringing that aesthetic outside creates a distinctive backyard bar that feels both modern and authentic. The combination of black pipe fittings with warm reclaimed wood creates exactly the kind of brewery-meets-loft style that has become genuinely timeless.
Build the bar’s structural frame from black galvanized pipe and pipe fittings (available at any hardware store), assembling the frame using flanges and elbows like a giant industrial puzzle. The frame can be a simple rectangular shape or more complex with shelving and hanging glass storage built in. Top the frame with thick wood planks — reclaimed barn wood looks especially appropriate here — and add additional wood shelving for glassware and bottle storage.
The visual contrast between heavy black metal and warm wood creates instant character. Style the bar with Edison bulb pendant lights overhead, leather accents, and brass or copper drinkware. Add bar stools with similar industrial styling for a fully integrated look. Project costs typically run $200 to $500 depending on size and pipe complexity.
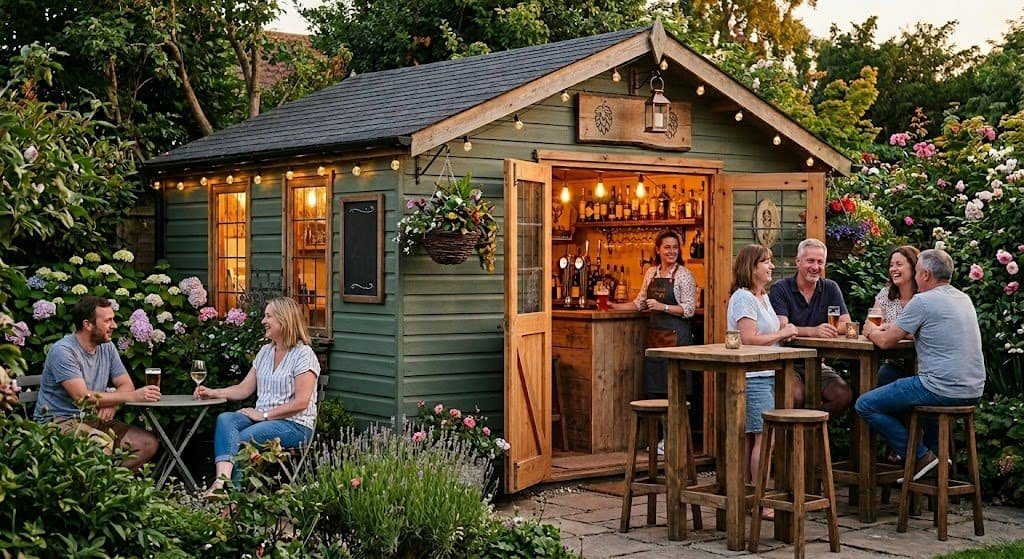
19. Garden Shed Converted to Bar
If your backyard already has a garden shed that’s underutilized, converting it into a dedicated outdoor bar might be the best use of existing structure you’ll ever find. The walls and roof are already built, you just need to transform the interior and front into a proper bar setup. This approach delivers maximum impact for minimum new construction.
Open up the front of the shed by replacing solid walls with a hinged window or removable panel that creates a serving counter when opened. Install a substantial bar surface that extends from inside the shed out toward guests. Inside the shed, build extensive shelving for bottles, glassware, bar tools, and supplies. Add a small refrigerator if you can run electricity, and consider installing a small window AC unit to make it usable on hot days.
The covered structure protects everything from weather, locks securely when not in use, and provides space for storage of all your bar accessories year-round. Decorate the exterior to match the rest of your backyard aesthetic — string lights, painted accents, climbing plants — and the shed transforms from a utility space into one of the most-used features of your home. Costs vary widely but typically run $300 to $1,000 depending on conversion complexity.
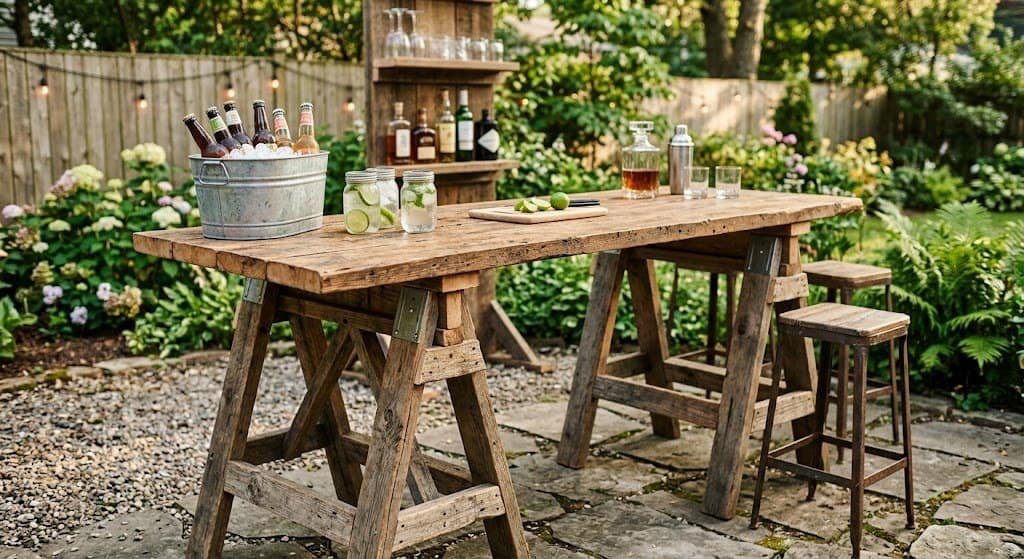
20. Simple A-Frame Sawhorse Bar
The easiest possible bar build that still delivers genuinely impressive results is the sawhorse bar — two A-frame supports holding up a substantial wood plank as the bar surface. This minimalist approach takes maybe two hours from start to finish, costs under $100, and looks remarkably high-end despite the simple construction.
Build or purchase two sturdy wooden A-frame sawhorses, ideally about 36 to 42 inches tall. Top them with a long, thick wood plank — solid wood, butcher block, or reclaimed lumber all work beautifully. The plank should be at least 8 feet long and substantial enough to feel solid (1.5 inches thick minimum). Stain or paint everything in coordinating colors that complement your outdoor space.
The genius of this design is its simplicity and flexibility. The bar is technically temporary, so it can be moved or rearranged easily. There’s no front facing guests, no built-in storage to manage, just a clean horizontal surface where you arrange everything beautifully each time. Style with a few statement bottles, beautiful glassware grouped artfully, fresh herbs in small vases, and bar stools pulled up at the right height. Total cost usually runs $50 to $100, making this the best value in the entire DIY bar category.
Essential Bar Stocking Tips for Any DIY Outdoor Bar
Building the bar is only half the project — stocking and styling it well is what makes it actually function during gatherings. A beautifully built bar with a sad selection of supplies feels like a half-finished project, while a modest bar that’s well-stocked feels professional and welcoming.
Start with the basics that work for the widest range of drinks: a quality vodka, gin, whiskey, tequila, and rum cover almost every cocktail category. Add a few mixers — tonic water, club soda, ginger beer, fresh citrus juices — and you can make most classic cocktails on demand. Don’t try to stock every spirit category right away. Build your collection gradually based on what you and your guests actually enjoy drinking rather than what looks impressive on the shelf.
Glassware variety matters more than quantity. Stock at least four to six each of: rocks glasses, highball glasses, wine glasses, and either champagne flutes or coupes. Avoid the trap of buying matching sets for every category — mismatched vintage glassware actually looks more interesting and intentional than perfectly coordinated sets, and it costs dramatically less from thrift stores and estate sales.
Bar tools are essential and surprisingly affordable. A basic bar tool kit including a shaker, jigger, strainer, muddler, bar spoon, and citrus juicer costs under $50 and dramatically expands what you can serve. Add a quality cutting board for citrus prep, a small ice bucket, and proper cocktail napkins, and your bar setup becomes genuinely functional rather than just decorative.
Finally, fresh ingredients separate amateur bars from professional-feeling ones. Stock fresh limes, lemons, mint, and seasonal fruits whenever you’re entertaining. A small herb garden growing nearby provides instant garnishes that make every drink feel special. These fresh elements cost almost nothing but they signal genuine care and attention to detail.
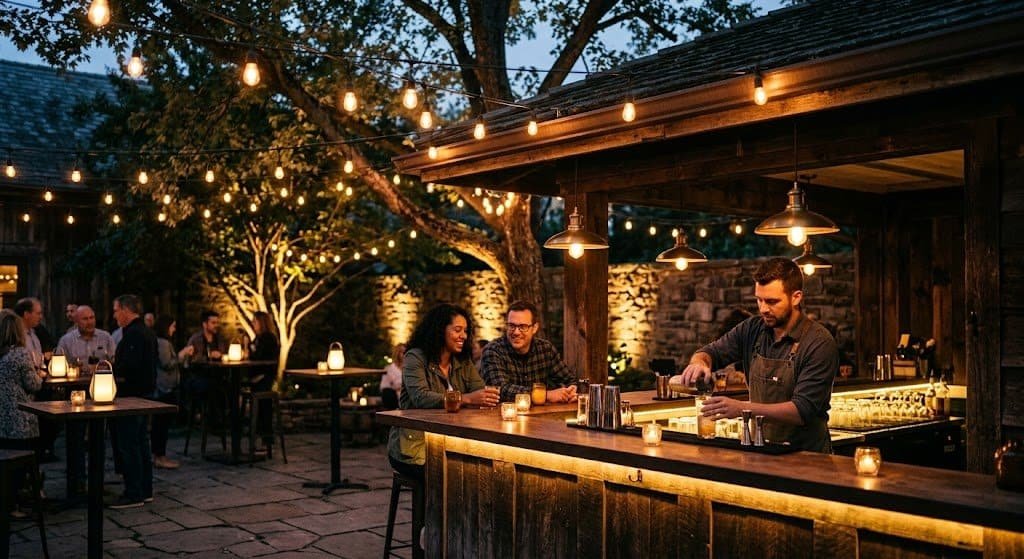
Lighting Tips for Outdoor Bar Atmosphere
The lighting around your DIY outdoor bar dramatically affects how the space feels, especially as evening sets in and gatherings stretch into night. Most homeowners underestimate how much lighting matters until they experience the difference proper bar lighting creates. The investment is small but the impact is enormous.
String lights overhead create the foundational warm glow that defines any outdoor entertaining space. Run cafe-style bulbs in a zigzag pattern above the bar area, ideally extending across the entire entertaining space rather than just over the bar itself. The light needs to feel ambient and immersive, not just functional. Edison-style bulbs add warmth and character, while smaller fairy lights create a more delicate, romantic feel.
Task lighting at the bar surface itself is equally important and often overlooked. Mounting LED strip lights underneath the bar overhang illuminates the work surface for cocktail preparation and gives the bar a subtle floating glow that looks professional and intentional. Battery-operated puck lights inside cabinets or shelving units highlight bottles and glassware beautifully without requiring electrical work.
Layer in candles for additional warmth and movement. Lanterns on the bar surface, hurricane vases with pillar candles nearby, or even battery-operated flickering candles all add the kind of dancing light that makes evening gatherings feel genuinely magical. The combination of overhead string lights, task lighting at the bar, and candle accents creates the layered illumination that separates ordinary backyards from unforgettable ones.
Final Thoughts
The best DIY outdoor bar ideas are the ones you’ll actually build and use, not the most ambitious projects on Pinterest. A simple sawhorse bar that gets used every weekend delivers far more lifestyle value than an elaborate built-in stone bar that takes two years to complete. Start with a project that matches your current skills, budget, and timeline, knowing that you can always upgrade or expand later as you learn what you actually want.
Whether you choose a quick weekend pallet bar, a flexible mobile bar cart, or an ambitious permanent stone counter, the project itself is part of the reward. Building something with your own hands creates the kind of pride that store-bought furniture never delivers, and your guests will inevitably ask “where did you get this?” — to which you’ll get to answer “I built it.” That simple exchange happens at every gathering, and it never gets old.
Most importantly, remember that the bar isn’t really about the bar at all. It’s about creating a gathering point that brings people together, a focal point that makes hosting effortless, and a backyard feature that transforms ordinary evenings into the kind of memories your guests talk about for years. Build something that fits your life, stock it with care, light it well, and watch your backyard become the favorite spot for everyone who visits.
Loved these ideas? Save this pin to your “Easy DIY Home Projects” board so you can come back to it when you’re ready to start building your dream backyard bar!
Reda More: 18 Coastal Living Room Ideas for a Beach Vibe You’ll Never Want to Leave


