We bought our house in 2019, and the backyard was basically a square of patchy grass with a cracked concrete slab that nobody wanted to look at. My husband kept saying we should put in a fire pit “someday.” Three summers went by. Nothing happened.
Then one Saturday in April, I got tired of waiting. I drove to Home Depot, came home with a $180 Solo Stove, three bags of pea gravel, and a cheap Adirondack chair. By that evening, we were sitting outside with a glass of wine watching the flames dance. And I cannot tell you the difference it made. That ugly concrete slab became the best part of our whole house.
That was four summers ago. Since then, I have made every fire pit mistake possible, upgraded our setup three times, and helped two neighbors build theirs. I have opinions about fire pits now. Strong ones.
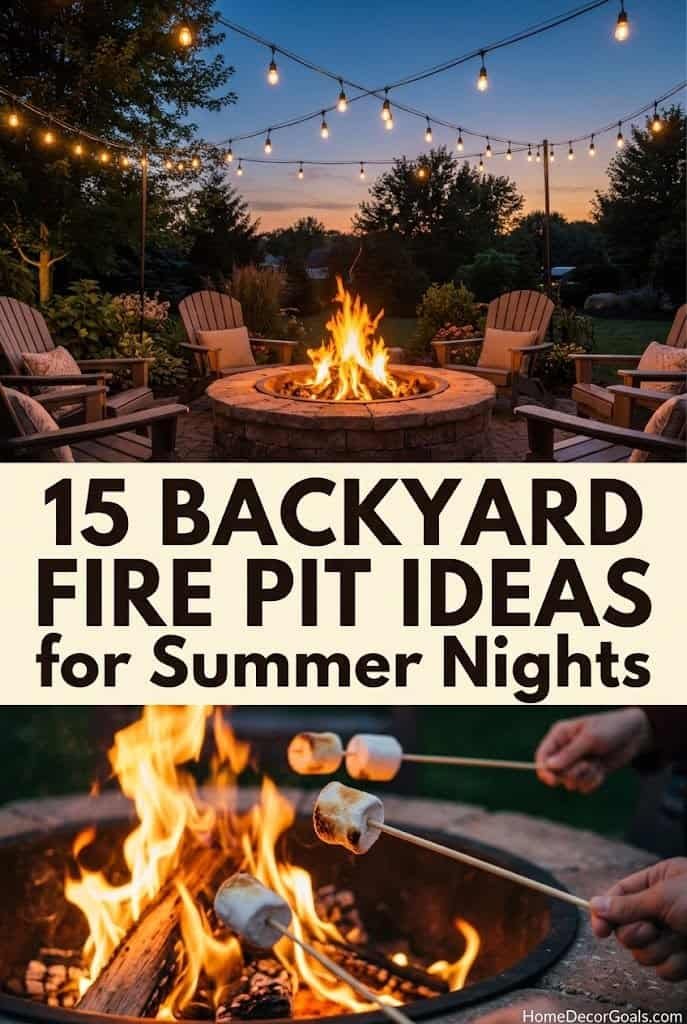
Here are 15 backyard fire pit ideas that actually work, organized by budget and style, with real advice from someone who has lived with a fire pit through summer storms, neighborhood gatherings, and one accidental marshmallow incident involving my neighbor’s dog.
Before You Buy: The One Question That Matters
Before you pick a fire pit idea, figure out one thing: gas or wood?
This decision shapes everything else. Here is the honest breakdown I give friends who ask:
Wood-burning — Real fire, real crackle, real smoke smell in your hair afterward. Cheaper upfront. Gets you the authentic campfire experience. But you deal with smoke blowing in somebody’s face, ash cleanup, and buying or chopping wood.
Propane/gas — Instant on, no smoke, no ash, no mess. You flip a switch and there is fire. Costs more upfront. But you can have flames in 10 seconds on a Tuesday night without any planning.
We went wood-burning for the authenticity. Three of my friends went propane after getting tired of smoky clothes. Both choices are right. Just know which one you want before spending money.
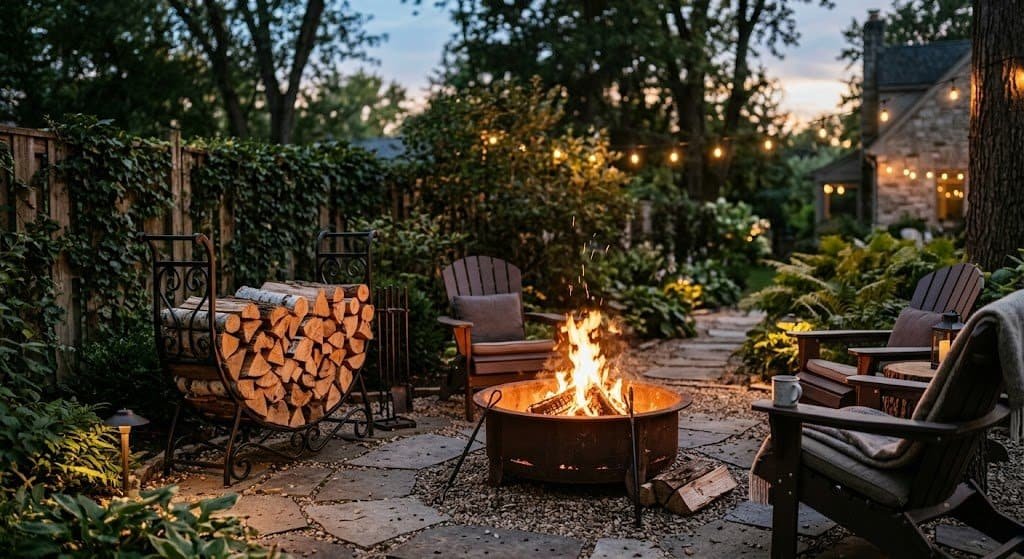
1. The Solo Stove Setup (Low-Smoke, Low-Effort)
If I had to recommend one fire pit to a first-time buyer, it is the Solo Stove Bonfire. I have had mine for four years. It still looks almost new.
The double-wall stainless steel design does something clever — it pulls air up through the bottom, superheats the fire, and burns the smoke before it escapes. You end up with bright flames and almost zero smoke drift toward the neighbors. (Our neighbor Jerry thanks us. His patio is 15 feet from our fence.)
The Bonfire 2.0 runs about $400. The smaller Ranger is $250. The huge Yukon is $650. They all work the same way.
Setup is zero effort — pull it out of the box, put it on pavers or gravel, throw in wood, light it. It is portable enough that we bring it to camping trips.
Honest drawbacks: It does not throw as much heat as a traditional fire pit because it burns so efficiently. On a 50-degree spring evening, you will want to sit close. Also, do not put it directly on a wood deck — the bottom gets hot. Use the stand or put it on pavers.
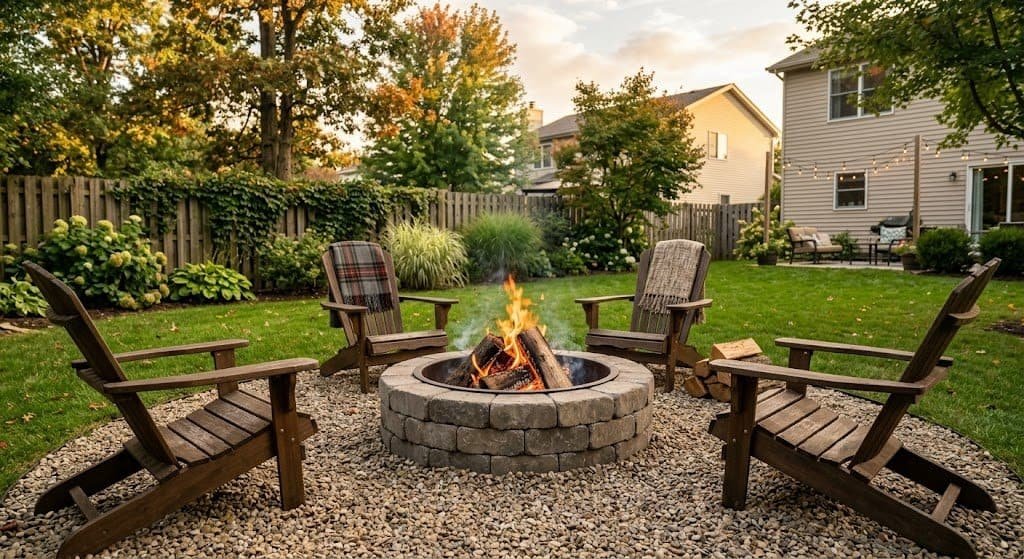
2. DIY Paver Fire Pit Under $200
Now, if you want the full in-ground fire pit look without paying a contractor, you can build one in an afternoon for around $150 to $200.
Here is what you need from Home Depot or Lowe’s:
- 32 to 36 concrete wall blocks (the curved kind, roughly $2 each)
- A bag of pea gravel for the base
- A fire pit insert ring (optional but recommended, about $50)
The build is stupid simple. Pick a flat spot at least 10 feet from any structure. Dig out a 4-foot circle, about 4 inches deep. Fill with pea gravel. Stack the blocks in two or three layers in a circle. Drop in the insert ring. Done.
My neighbor Mark built his in one Saturday morning. His son helped. It has been there for two years and looks better than some of the professionally-built ones I have seen.
Two things I wish somebody had told him before he built it: measure your chairs first. He built a 4-foot diameter pit, but his chairs needed 5-foot clearance to sit comfortably. He had to rebuild. Also, pea gravel drains rain. Do not skip it, or you will have a soggy fire pit every spring.
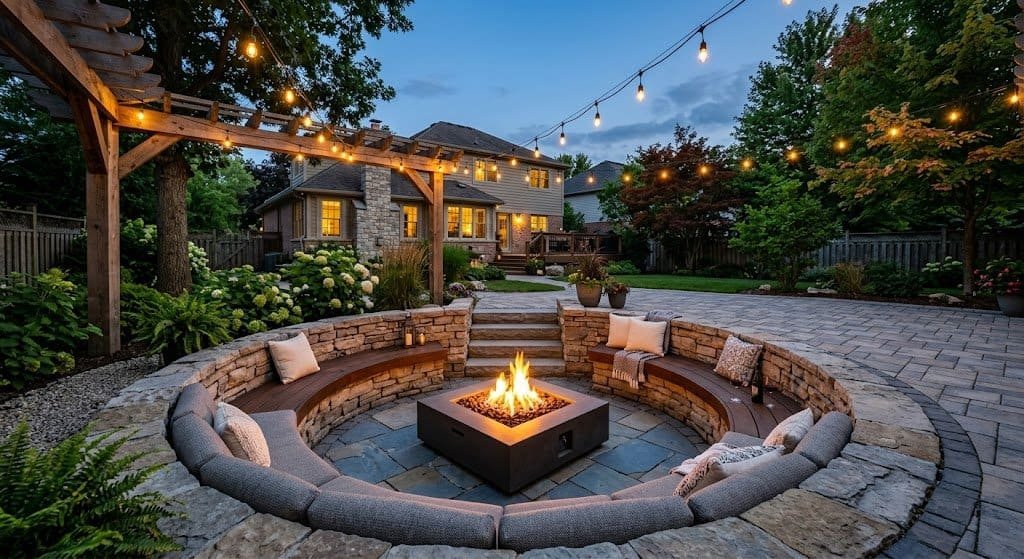
3. The Sunken Fire Pit Conversation Area
This is the upgrade for people with real backyard space and real budget. A sunken fire pit — where you dig down about 2 feet and create a built-in seating area around it — is what you see on Pinterest and in those magazine spreads.
I have not built one myself, but my sister-in-law had hers done last year in Ohio. Total cost with professional help: $4,200. That included the excavation, retaining wall stones, a gas fire pit installation, built-in stone bench seating, and a paver surround.
Her contractor told her the sunken design has two real advantages beyond looks. First, it blocks wind, so the fire burns steadier. Second, it creates a natural “room” feeling that raised fire pits do not get.
If this is out of budget, you can fake the sunken look for cheap by using low seating (floor cushions, poufs, or low Adirondack chairs) around a regular fire pit. Same intimate feeling, way less money.
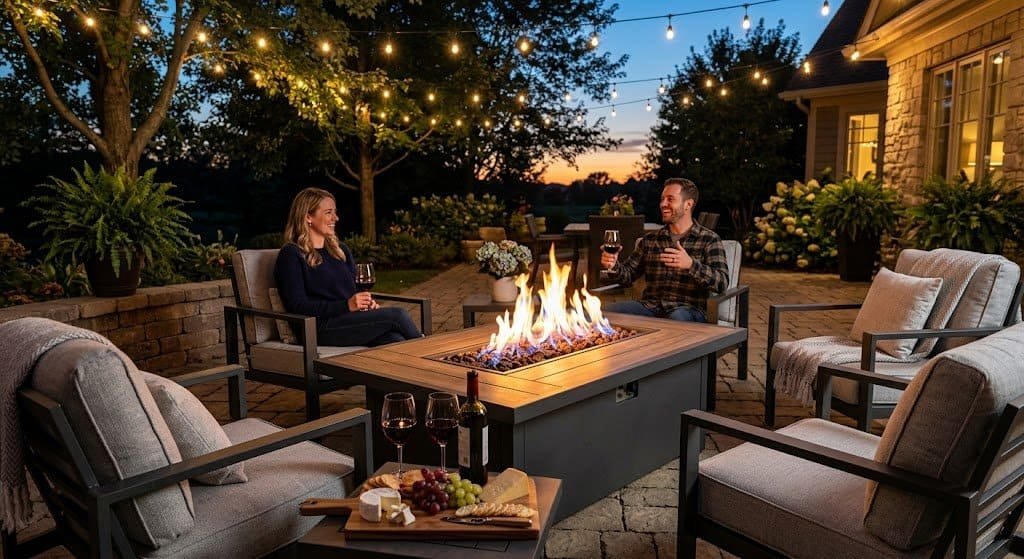
4. Propane Fire Pit Table (For Easy Entertaining)
If you want something that doubles as a coffee table when not lit, propane fire pit tables are the answer. You flip a switch, flames come up through a bed of decorative stones, and there is zero cleanup.
Target, Wayfair, and Costco all sell decent ones in the $300 to $700 range. We have one at our lake house — a rectangular Outland model we got at Costco for $450. It runs on a standard 20-pound propane tank hidden in the base. One tank lasts us about 15 to 20 evenings.
What I love: guests can sit around it with drinks and appetizers right on the edge of the table. The flames are beautiful but never too big.
What I hate: the wind. On windy nights, the flames blow sideways and sometimes blow out entirely. Some models have glass wind guards you can buy separately — worth the extra $80.
Best use case: smaller patios, condo balconies, or anywhere you want something that looks finished without the mess of real firewood.
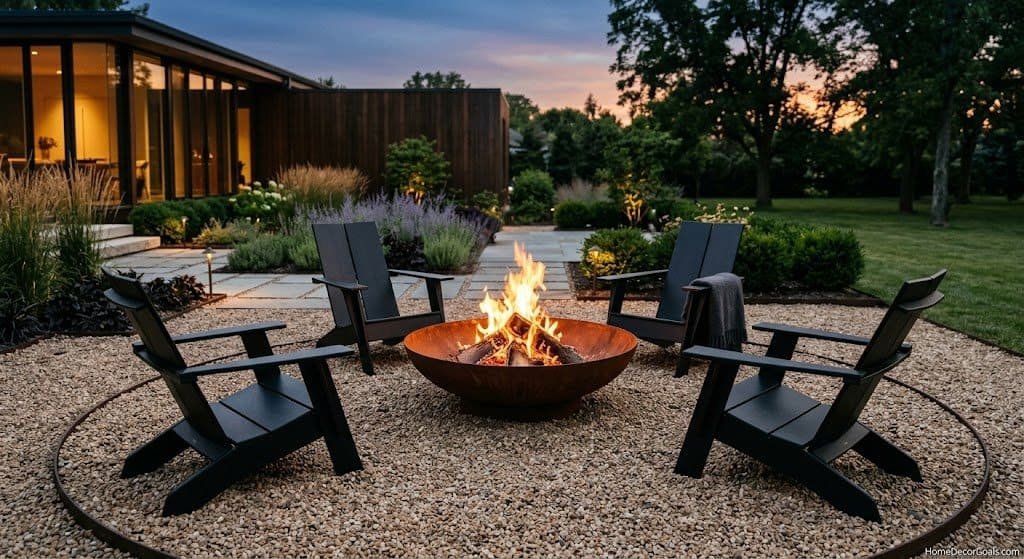
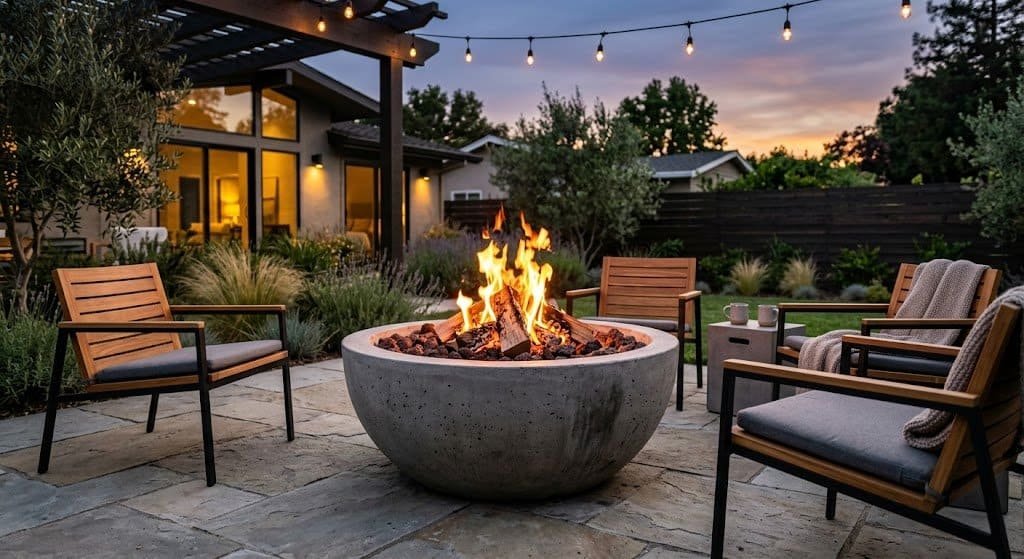
5. Budget Corten Steel Bowl (Modern Look for $150)
If your backyard leans modern or industrial, skip the concrete pavers and get a Corten steel fire bowl. Corten is that weathered rust-colored steel you see on fancy restaurant patios.
Amazon sells a 30-inch Corten fire bowl for around $150. It arrives shiny, then develops a beautiful rust patina over the first few months of being outside. That rusted look is the entire point — it is supposed to look weathered. Do not try to prevent it.
Place it on a bed of pea gravel or pavers. Do not put it on grass (the heat kills the grass underneath) or directly on a wood deck.
One of my clients has this exact setup in her Colorado backyard — a single Corten bowl on a pea gravel circle, four matte black Adirondack chairs around it, and a couple of galvanized metal side tables. The whole setup probably cost her $600 and it looks like it belongs in Architectural Digest.
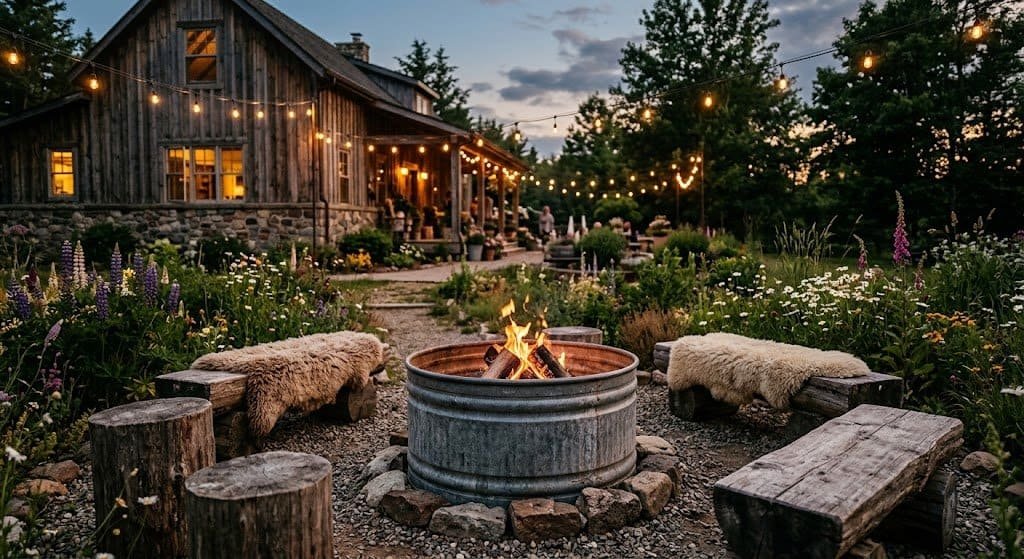
6. Stock Tank Fire Pit (The Farmhouse Hack)
Okay, this one is a little weird but stay with me. A galvanized stock tank — yes, the kind farmers use to water cattle — makes an incredible rustic fire pit.
Tractor Supply sells them for $80 to $150 depending on size. A 2-foot diameter round tank is the sweet spot. Drill a few drainage holes in the bottom. Fill the bottom 3 to 4 inches with lava rocks or pea gravel. Build your fire on top of that.
My friend Jessica in Austin has this in her backyard. Her entire outdoor space is farmhouse-chic — weathered wood, metal accents, a lot of string lights — and the stock tank fits perfectly. Cost her $95 total. Looks like a $500 designer piece.
The only warning: if you go bigger than 2 feet diameter, the fire needs a lot of wood to actually feel warm. Start smaller.
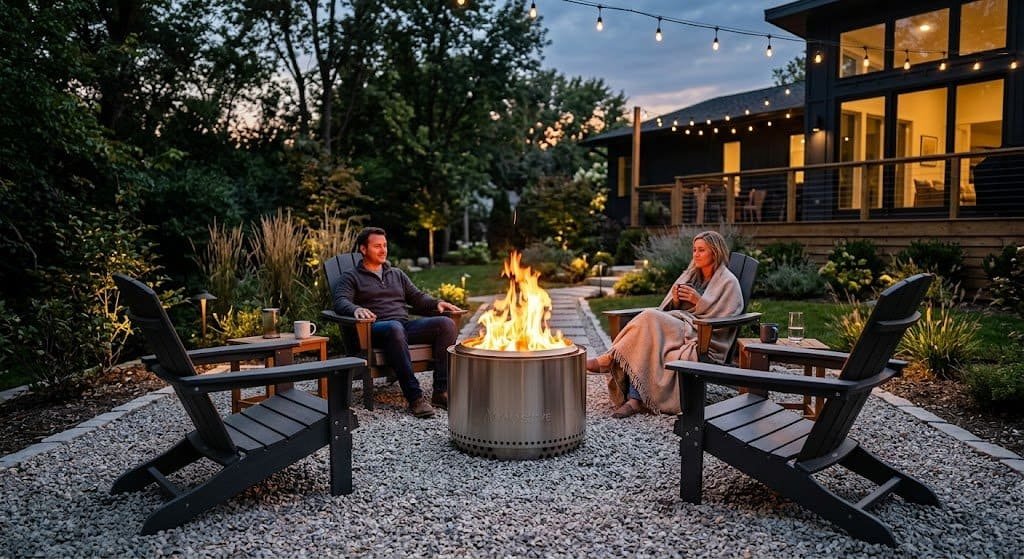
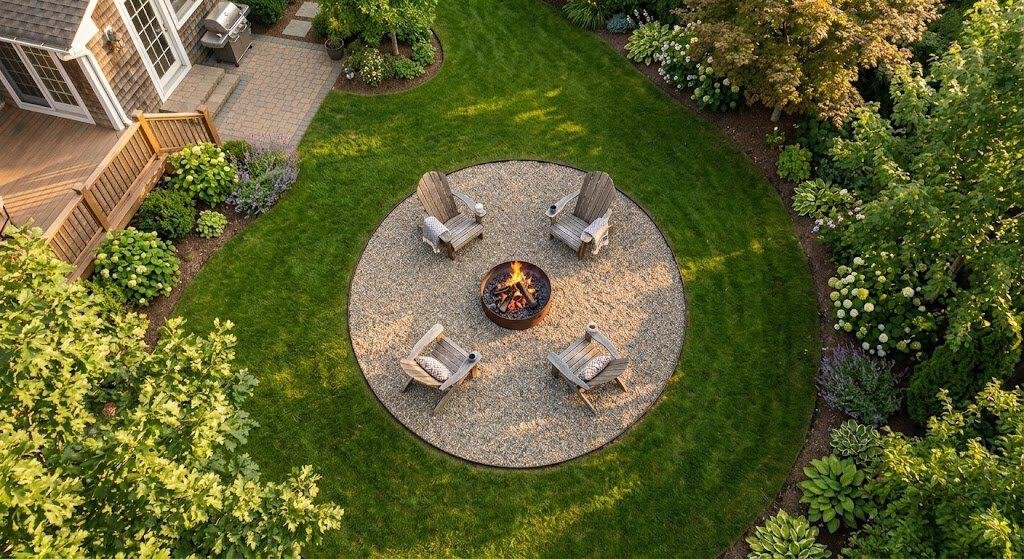
7. Gravel Patio Fire Pit Area
Forget about the fire pit itself for a second. The surface underneath and around it matters almost as much as the fire pit itself.
The best budget option for creating a whole fire pit “area” is pea gravel. For about $200 to $300, you can create a 12-foot diameter gravel circle around any fire pit you choose.
What you need: landscape fabric (to keep weeds from growing up through), metal or plastic edging to contain the gravel, and 2 to 3 cubic yards of pea gravel delivered (call a local landscape supply — they bring it by truck for around $40 per cubic yard).
The look is magic. Pea gravel crunches underfoot, it drains rain perfectly, it does not catch fire from stray embers, and it photographs beautifully. It also lets you skip grass maintenance in that corner of your yard.
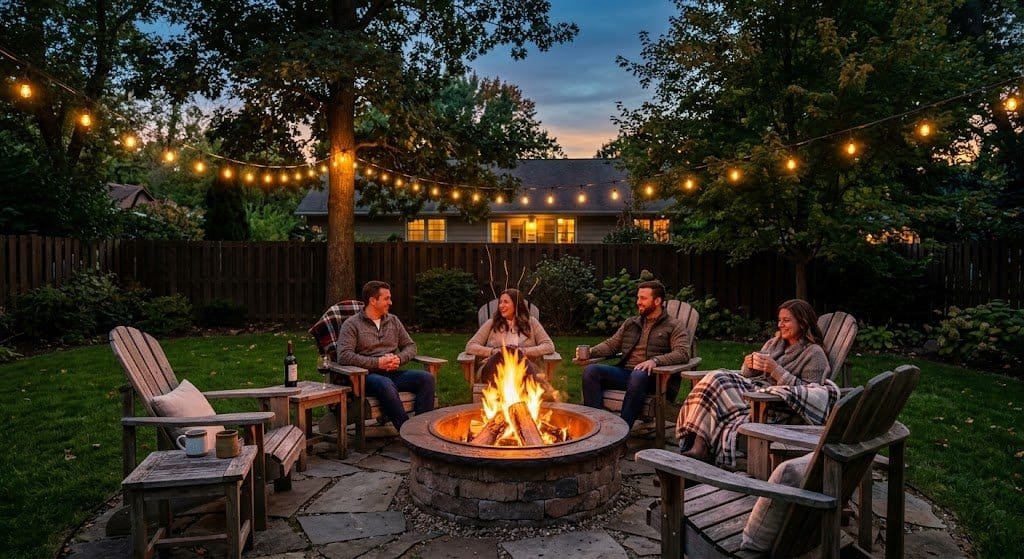
We did this in our backyard the second summer. It turned our random fire pit in the grass into a defined outdoor “room.” Guests instinctively gather there.
8. Repurposed Concrete Planter Fire Pit
This one took me a minute to believe when my friend showed me. Take a large concrete planter — the round kind you see at garden centers — drill some air holes near the top, and use it as a fire pit.
Home Depot sells 24-inch concrete planters for around $120. Add a fire pit insert ring ($30 to $50) and a bag of lava rocks. Total investment: under $200.
The concrete handles heat well. The planter shape makes it look more sculptural than a standard fire pit. It also tends to be the right height for sitting around in standard patio chairs, which regular fire pit bowls often are not.
Honest warning though: not every “concrete” planter is actually concrete. Some are resin or lightweight composite. Those will crack or melt when exposed to real fire. Check with the store before you buy. Real concrete will weigh 100+ pounds for a 24-inch planter.
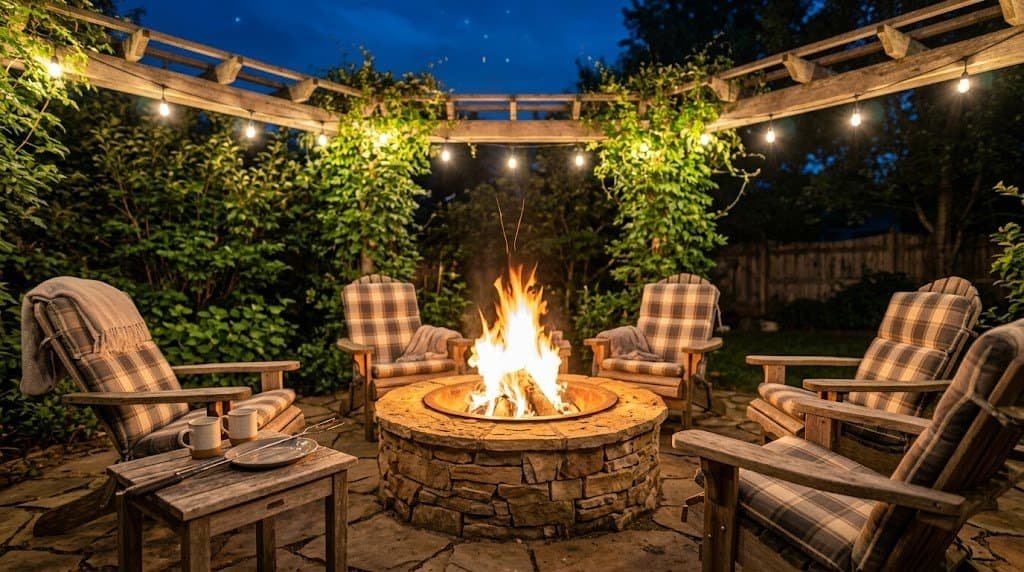
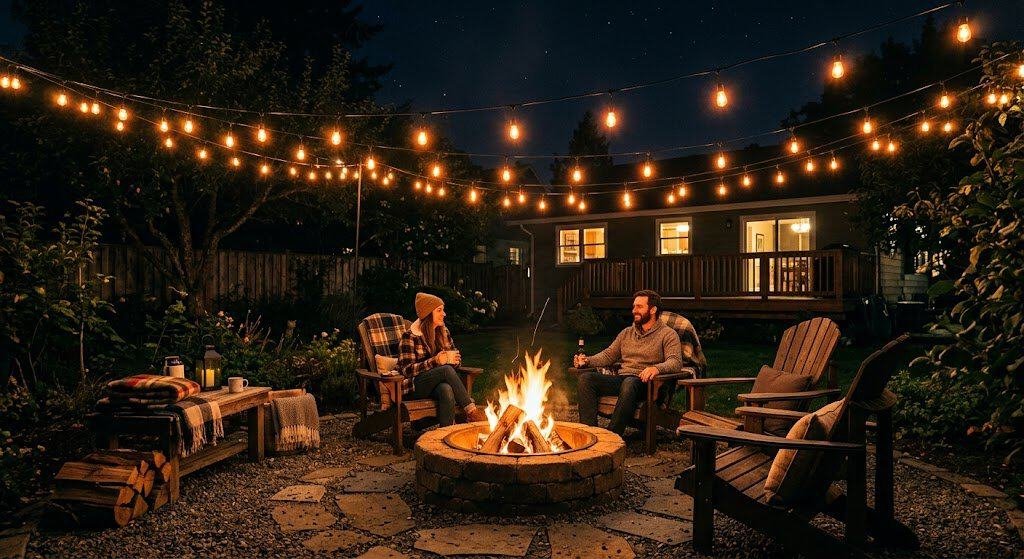
9. The String Lights Setup That Changes Everything
I know this article is about fire pits, but I have to tell you: the string lights above the fire pit matter almost as much as the fire pit itself.
When it gets dark, a fire pit alone creates a bubble of light only about 6 feet wide. You cannot see faces clearly. The rest of the yard feels like a black void. Add string lights, and suddenly the whole seating area glows warm and everybody can actually see each other.
The setup I recommend for any fire pit area:
- Two 48-foot G40 bulb string lights (Amazon Basics or Brightech make reliable ones for $25 to $40 each)
- Two anchor points — trees, fence posts, a deck post, or a house eave
- Guy wire strung between the anchor points, with the string lights hung below it, so the wind does not take them down
Total cost: about $80 to $120. Total visual impact: transformative. This is the single upgrade that turns a backyard fire pit from “a fire in the yard” to “somewhere you want to spend four hours.”
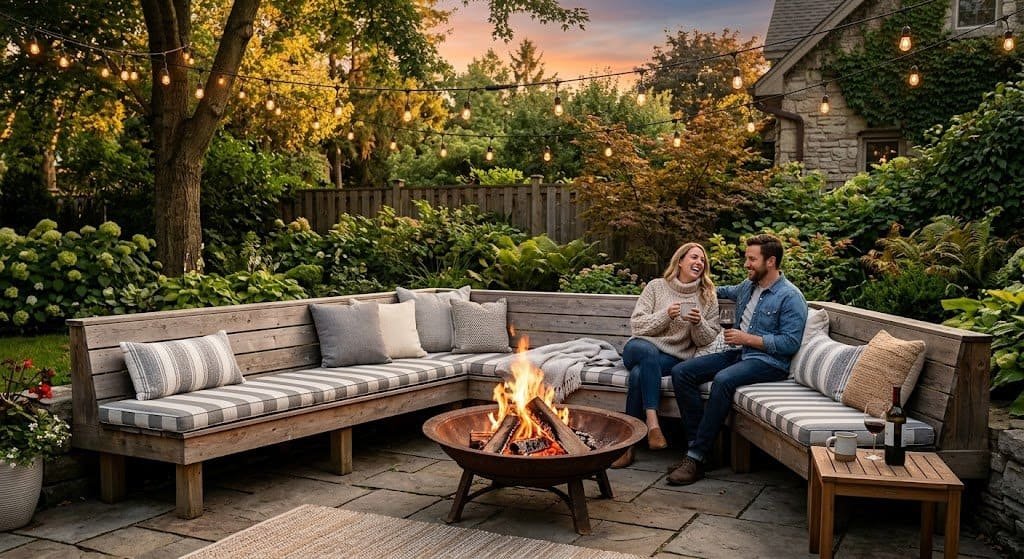
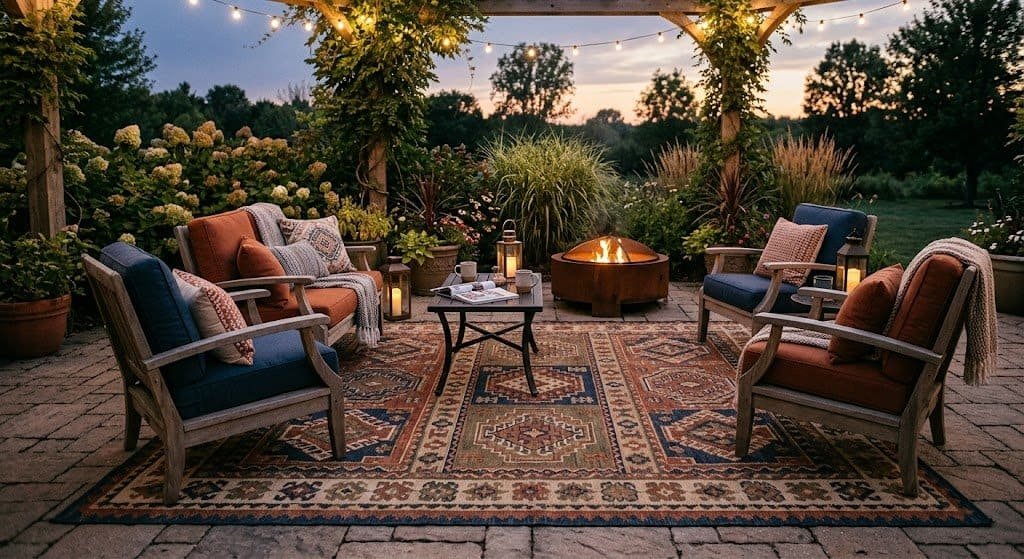
10. Built-In Bench Seating Around the Fire Pit
If you want the finished, designed look, built-in bench seating around your fire pit is the answer. It creates that “outdoor room” feeling without any chairs to move around.
You can build this DIY with cinder blocks, wood top caps, and outdoor cushions. My brother built his for $350 total. He used 2×6 pressure-treated lumber stacked on concrete block footings, topped with 2-inch thick outdoor cushions from Wayfair.
The dimensions that work: bench seat should be 16 to 18 inches high (same as an average chair) and at least 18 inches deep. Leave 4 to 5 feet between the bench and the fire pit center.
What makes built-in benches great is they don’t blow over in storms, they don’t get dragged around by kids, and they can seat 8 to 12 people easily. What is harder: they’re permanent. Change your mind later and it is a weekend of work to remove them.
11. Fire Pit With Integrated Wood Storage
This is one of those details that makes a fire pit area look custom and designed. Build or buy a wood storage rack next to your fire pit, and keep it stocked with split firewood.
The cheap version: a $60 metal log rack from Amazon, placed a few feet from your fire pit, loaded with firewood. The stacked wood becomes a design element.
The nicer version: a built-in stone or wood structure that matches your fire pit. I have seen beautiful examples where the wood rack is built right into an outdoor wall or fence, with a small roof to keep the wood dry.
Buy firewood in bulk from a local supplier (not the overpriced bundles at gas stations). A half cord runs $150 to $250 depending on where you live and will last you most of the summer.
12. The Outdoor Rug Under the Fire Pit (With a Warning)
An outdoor rug under your seating area (not directly under the fire pit, but near it) grounds the whole space and makes it feel intentional.
A 9×12 foot polypropylene outdoor rug from Target or Ruggable runs about $150 to $300. Polypropylene handles rain, sun, and spills. It will fade in 2 to 3 seasons of intense sun, but it’s easy to replace.
The warning: never put the rug directly under the fire pit. Stray embers will burn holes in it. Keep the rug at least 3 feet from the fire pit itself, under the seating area only.
I learned this lesson personally with a nice West Elm outdoor rug and a careless night around the fire. There is now a permanent small black hole in my rug that I pretend is “character.”
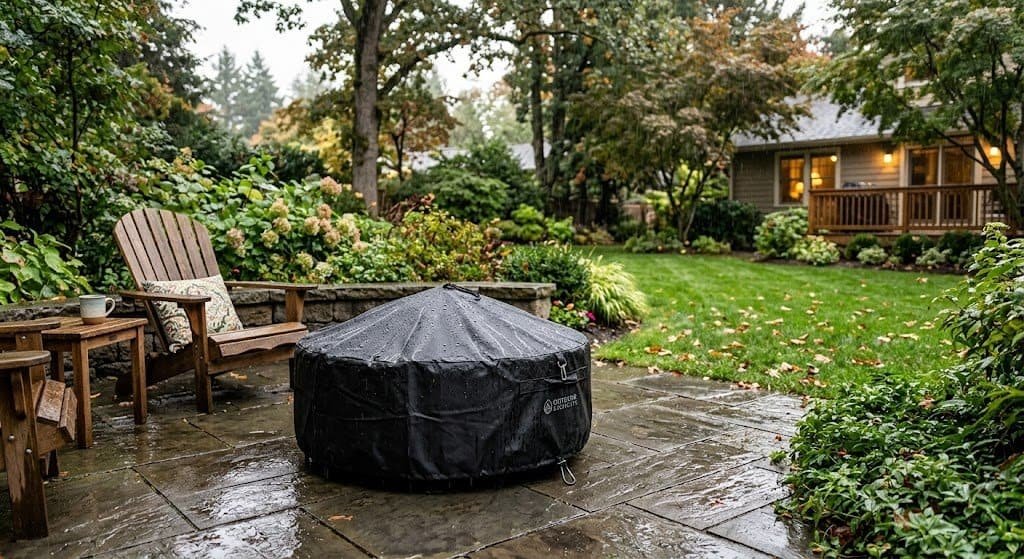
13. Weather Protection for Your Investment
Most people do not think about this until their fire pit is covered in rust. Buy the cover.
Every decent fire pit has a manufacturer cover available for $30 to $60. Get it. Use it. Pull it over the fire pit after the ashes cool, and rain, snow, and UV will not destroy your fire pit over the years.
For wood-burning fire pits, also consider a spark screen — a dome-shaped wire mesh cover that goes on top when the fire is burning. It stops embers from flying out and lighting your mulch on fire. About $40. Worth every penny if you have kids or pets running around.
Both of these feel like unnecessary extras when you buy the fire pit. They are not. Our original Solo Stove still looks great at year four because of one thing: we actually use the cover.
 📌 Save
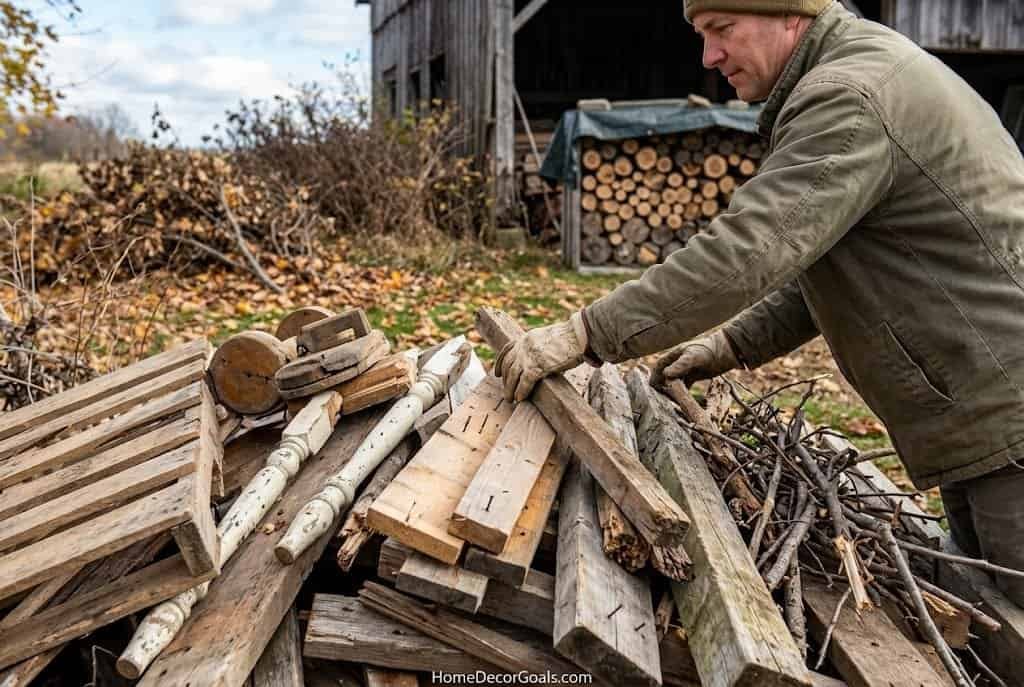
14. The Firewood Source Everybody Gets Wrong
You have the fire pit. You have the setup. Now you need wood. And 90% of people I talk to about this are overpaying dramatically.
Do not buy those little bundled firewood packs at gas stations or grocery stores. Those cost $7 to $10 for what amounts to maybe 45 minutes of burn time. That math is insane.
Do buy from a local firewood supplier. Search “firewood near me” or check Craigslist and Facebook Marketplace for “seasoned firewood delivery.” A face cord (4 feet tall, 8 feet wide, 16 inches deep) runs $120 to $200 in most areas and will give you 40+ fires.
What to ask before buying: Is it seasoned? (Meaning dried for at least 6 months.) Unseasoned wood is smoky and hard to light. If they cannot tell you when it was cut, walk away.
Best woods for backyard fire pits: Oak (long-burning, hot), hickory (great smell), cherry or apple (amazing aroma, perfect for cooking over). Avoid pine and evergreens — they spark and produce creosote.
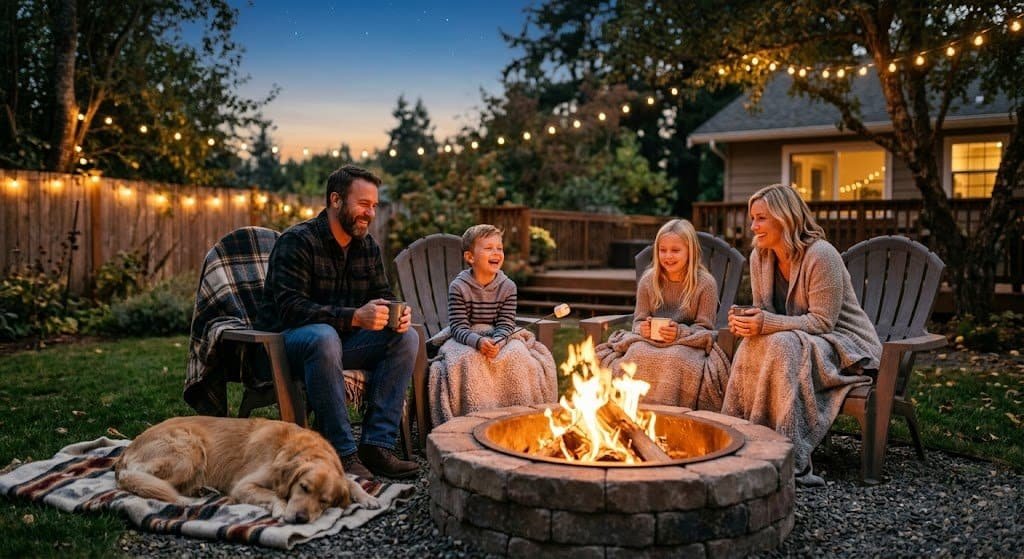
15. The Fire Pit Night Ritual That Makes It All Worth It
Here is the thing nobody tells you about owning a fire pit: the setup is 10% of it. The actual using it is 90%. And you have to build the habit.
What we do, most summer nights: around 7:30 p.m., after dinner, my husband walks out and starts the fire. I grab a bottle of something and two glasses. The kids bring out a blanket. We sit outside until 9:30 or 10. Some nights we talk about everything. Some nights we barely talk at all.
That fire pit, more than any room in our house, is where we actually connect as a family. No phones. No TV. Just flames and the smell of woodsmoke.
A good fire pit is not really about the fire. It is about having a reason to go outside and sit still together. That is what you are buying.
Quick Budget Breakdown: What a Full Fire Pit Area Actually Costs
For anyone planning a complete fire pit area from scratch, here is what it looks like realistically, depending on what level you go:
| Setup Level | Fire Pit | Surface | Seating | Lighting | Total |
|---|---|---|---|---|---|
| Budget | $150 (Corten bowl) | $100 (pavers) | $200 (4 used Adirondacks) | $40 (string lights) | $490 |
| Mid-range | $400 (Solo Stove) | $300 (pea gravel) | $500 (4 new Adirondacks + cushions) | $120 (better string lights) | $1,320 |
| Full build | $2,500 (gas insert + stone) | $1,200 (paver patio) | $1,500 (built-in benches + cushions) | $250 (string lights + path lighting) | $5,450 |
You do not need the full build to have an amazing fire pit area. Honestly, our budget-level setup (a Solo Stove, some pavers, thrift store chairs, and Amazon string lights) is what we lived with for three years and loved.
Frequently Asked Questions
How far should a fire pit be from the house?
At least 10 to 15 feet from any structure, including fences and overhangs. Check your local fire codes — some cities require 20 feet or more. Also keep fire pits away from overhanging tree branches, where sparks can ignite dry leaves.
Can I use a fire pit on my wood deck?
Only with precautions. You need a fire pit mat (heat-resistant pad that protects the deck) and ideally a fire pit that is raised off the surface. Gas fire pit tables are safer for decks than wood-burning ones. Many HOAs and local codes prohibit wood-burning fire pits on wooden decks entirely.
What is the best wood to burn in a fire pit?
Hardwoods like oak, maple, hickory, cherry, and apple. These burn longer, hotter, and cleaner than softwoods. Avoid pine, fir, cedar, and anything with sap — these produce excessive smoke and dangerous sparks.
How do I keep my fire pit from rusting?
Three things: cover it when not in use, empty ashes regularly (wet ashes accelerate rust), and if it is cast iron, season it with cooking oil occasionally. Stainless steel and Corten steel pits handle weather better than painted steel.
Are smokeless fire pits really smokeless?
Not completely, but close. Solo Stove and similar double-wall designs reduce smoke by about 70 to 80% compared to traditional fire pits. You will still get some smoke when starting the fire and when wood is unseasoned or damp.
Do I need a permit for a backyard fire pit?
Check your local fire department or city ordinances. Some cities require permits for permanent built-in fire pits. Portable fire pits generally do not require permits but still must follow local burn regulations, especially during dry seasons or burn bans.
Can I cook over a backyard fire pit?
Yes, and it is amazing. Get a fire pit cooking grate (fits over the top of the pit) or tri-pod cooking setup for about $40 to $80. Wait for flames to die down to hot coals before cooking — open flames burn food. Hot dogs, kabobs, foil-wrapped potatoes, and s’mores are the easy starting points.
Related Articles
- 25 Stunning Outdoor Patio Ideas for Summer 2026
- 16 Best Outdoor Rugs for Patios and Decks
- How to Create an Outdoor Living Room on a Budget
- 20 Small Balcony Decor Ideas That Maximize Space
What is your favorite thing about your backyard fire pit? Drop a comment and tell me — I love hearing how other people use theirs.