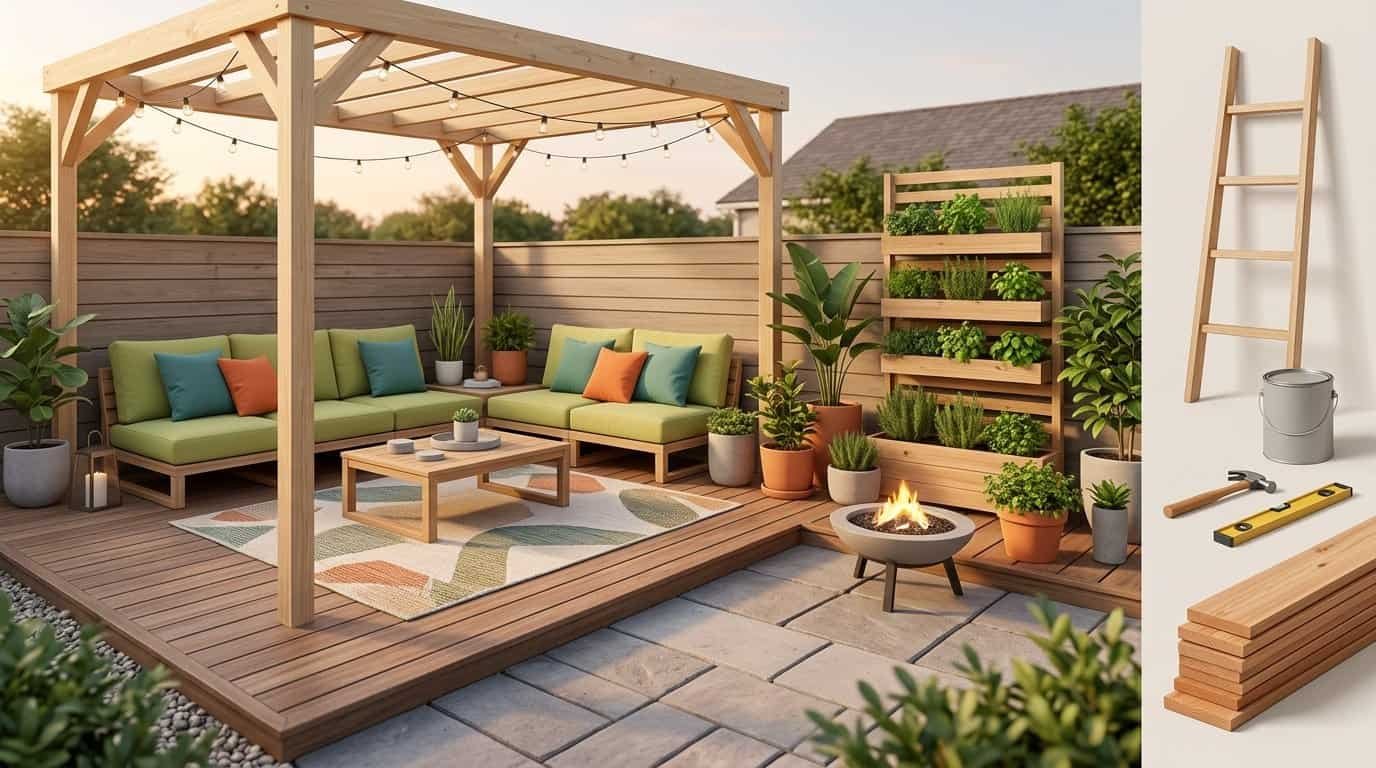
I spent three summers sitting on my back patio in a $15 folding camping chair, staring at a concrete slab surrounded by a wooden fence, thinking “this would be nice if it looked better” without ever doing anything about it. The patio was functional in the way a parking lot is functional — technically usable, emotionally empty, and about as inviting as a waiting room in a dentist’s office.Then I visited my friend Elena’s house for a Saturday evening cookout. Elena’s backyard is roughly the same size as mine — maybe twelve by fifteen feet of usable patio space behind a standard suburban house. But when I walked through her back door, I stopped. I actually stopped in the doorway and said out loud, “When did you build this?”She had not built anything. She had not hired a contractor. She had not even spent very much money. But what she had done was treat her patio like a room — the same way she would treat a living room inside her house. There was a defined seating area with a sectional sofa (outdoor, weatherproof). There was a rug underfoot. There was a coffee table in the center. There were throw pillows. There was lighting — string lights overhead and lanterns on surfaces. There were plants along the perimeter. And there was music playing from a speaker on a side table.It looked like a page from a Pottery Barn catalog. But when I asked what she spent, she laughed and said, “Around four hundred, and half of that was the Facebook Marketplace sectional.”Four hundred dollars. For a room. An entire room that did not exist before — a room that added functional living space to her house, that hosted dinner parties and Sunday morning coffees and Tuesday evening wine-and-books sessions, that made her home feel twice as large because every warm evening, the walls of her house effectively expanded to include the outdoors.That evening changed how I thought about outdoor spaces. An outdoor living room is not a luxury reserved for people with custom-built pergolas and $3,000 teak furniture sets. It is a mindset shift — treating the space outside your back door with the same intentionality you use for the space inside. And with the right strategy, you can create an outdoor room that feels complete, comfortable, and genuinely beautiful for $200 to $500.This guide walks you through every step, from the ground to the ceiling, with exact costs, specific product recommendations, and the design thinking that transforms a bare patio into a room you never want to leave.
Step 1: Define Your Space With a Rug (Budget: $25-$60)
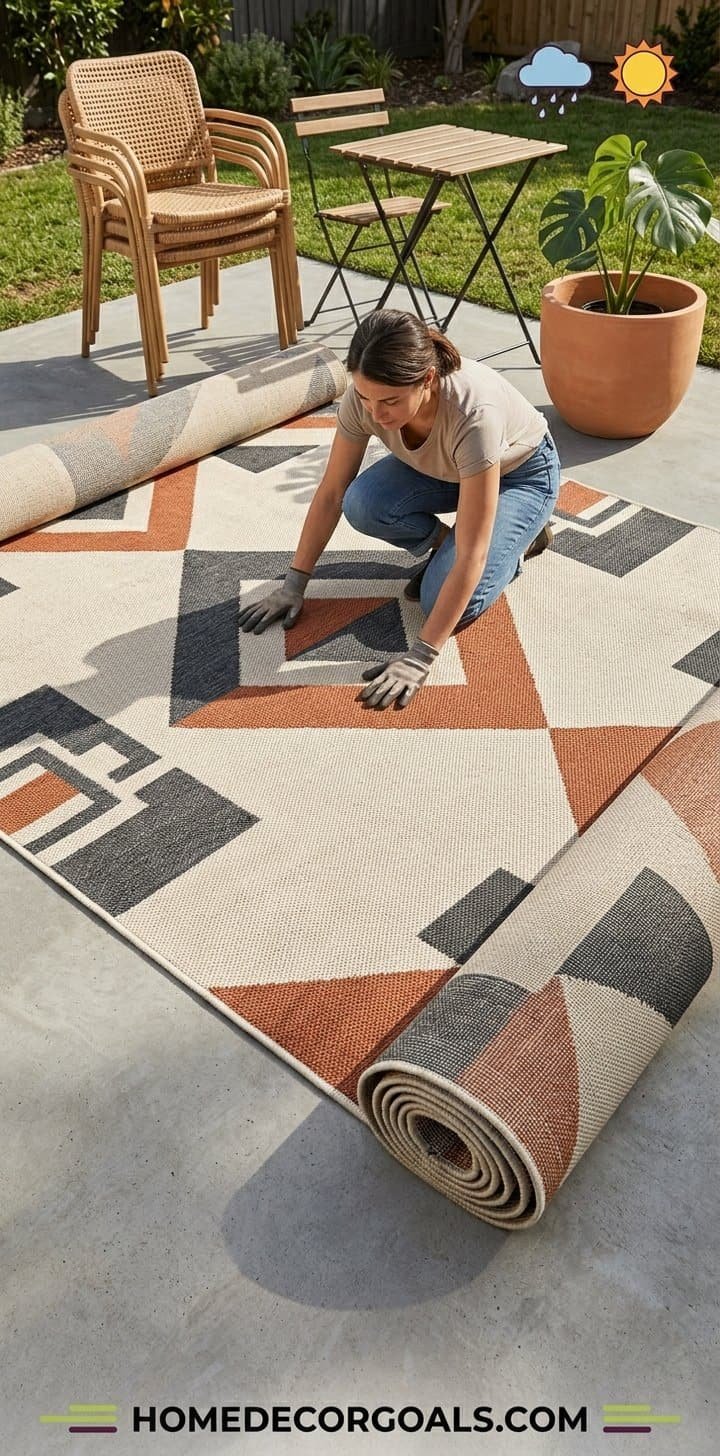
Every interior designer will tell you the same thing: a room starts with the rug. This is equally true outdoors. An outdoor rug placed on your patio or deck surface draws an invisible boundary that says “this is the living room” — separating the seating area from the grill area, the walkway, and the general open space. Without a rug, outdoor furniture looks like it was placed randomly on a slab of concrete. With a rug, the same furniture looks arranged, intentional, and unified.The rug size should be large enough that the front legs of your primary seating sit on it. For a typical outdoor living room with a sofa, two chairs, and a coffee table, a 5×7 or 6×9 rug provides adequate coverage. Measure your seating arrangement first — lay out the furniture where you want it, then measure the footprint and buy a rug that covers at least 80 percent of that area.For budget buying, check Walmart, Target, and Amazon for outdoor polypropylene rugs in the $25 to $60 range. The Safavieh Courtyard collection and the Nuloom indoor/outdoor line consistently deliver the best style-per-dollar in this price range. Choose a pattern and color that anchor your entire outdoor color scheme — every other design decision you make (cushion colors, throw blanket, planter choice) should reference back to the rug’s palette.Flatweave construction is mandatory for outdoor use. High-pile rugs trap water, grow mold, and deteriorate within one season. Flatweave rugs drain quickly, dry within hours, and survive three to five years of regular outdoor use. Shake the rug out weekly to remove debris and hose it down monthly for deep cleaning.
Step 2: Seating That Feels Like a Living Room (Budget: $100-$250)
The seating arrangement is what makes the difference between “patio furniture” and “outdoor living room.” Patio furniture sits in a line along the house wall. An outdoor living room has seating arranged in a conversation circle — facing inward, creating a social space where people naturally talk to each other rather than staring at the fence together.
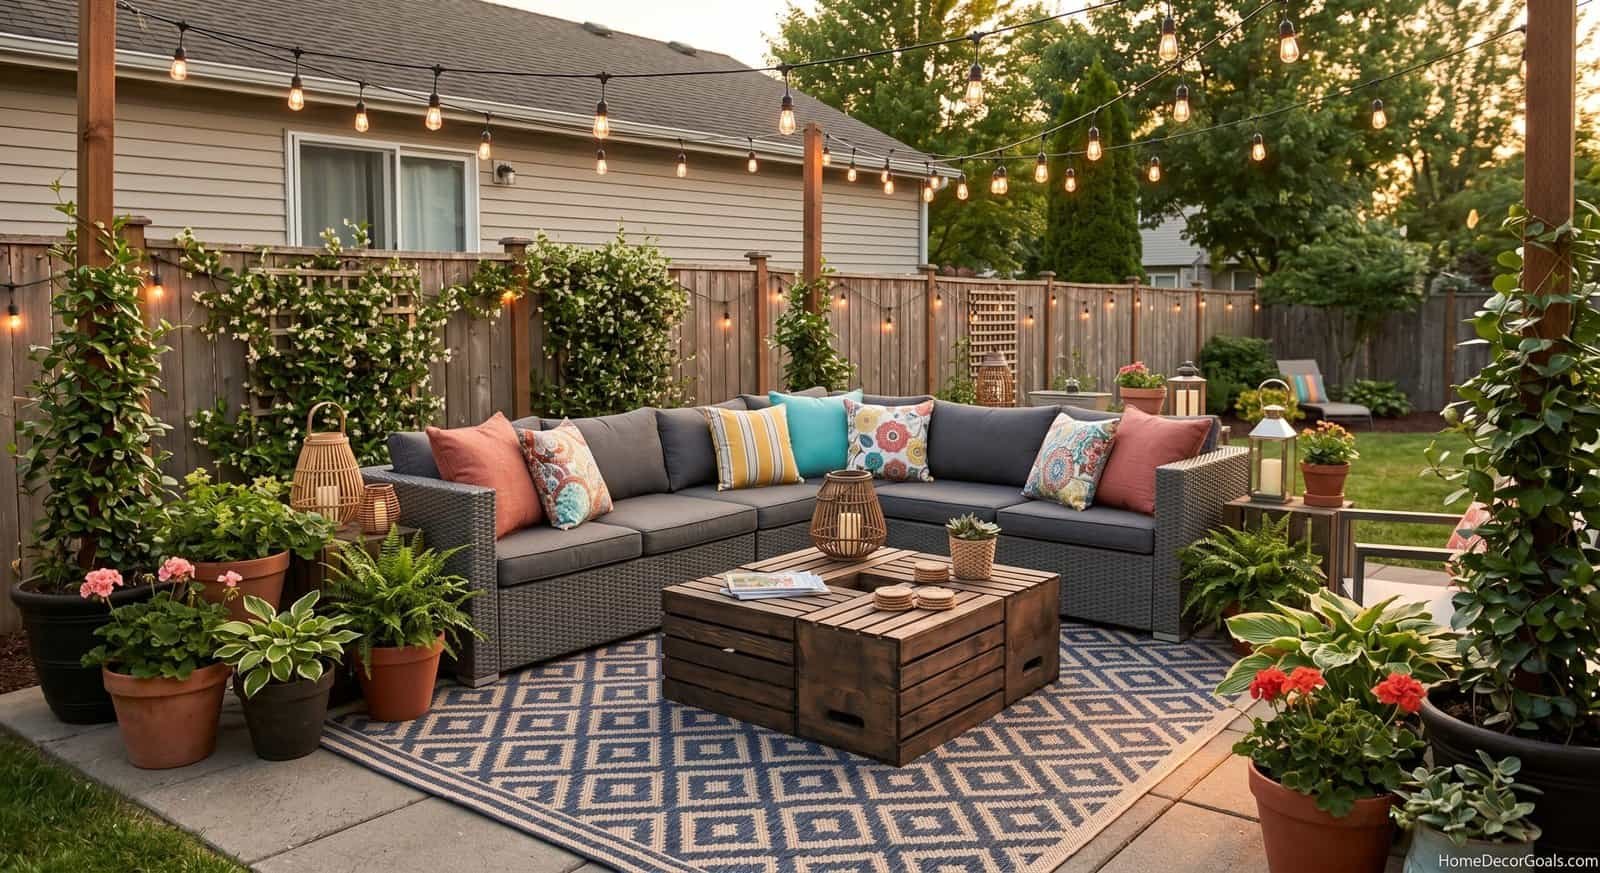
The Budget Sectional Strategy: The most impactful seating choice for an outdoor living room is a sectional sofa or an L-shaped configuration, because it creates the most seating capacity in the smallest footprint and immediately reads as “living room” rather than “patio.” New outdoor sectionals start at $300 to $500, but Facebook Marketplace, OfferUp, and Craigslist consistently have used outdoor sectionals for $80 to $200 — often in excellent condition because people upgrade, move, or simply decide they do not use their patio.
When buying used, check the frame for rust or structural weakness (sit on it hard in multiple spots), and plan to buy new cushion covers ($30 to $60 for a full set on Amazon) if the existing ones are faded or stained. The frame is the expensive part; the cushion covers are the cheap, replaceable part. A $120 used sectional with $40 in new cushion covers gives you $500 worth of seating for $160.The Mix-and-Match Strategy: If a sectional is not available or does not fit your space, create an L-shaped seating arrangement using two separate pieces positioned at a 90-degree angle. A small outdoor loveseat ($80 to $150 from Walmart or Target) paired with two individual chairs ($25 to $50 each from the same line) arranged in an L or U shape creates the same conversation-circle effect as a sectional at a similar total cost.The Creative Alternative: Wooden pallets, cleaned and sanded, stacked two high, and topped with thick outdoor cushions ($20 to $40 each) create a DIY pallet sofa that costs $30 to $80 total and has become one of the most pinned outdoor furniture ideas on Pinterest for three consecutive years. The rustic, industrial look works perfectly with bohemian, farmhouse, and casual outdoor aesthetics. Many hardware stores and warehouses give pallets away for free — ask before you take, as some are chemically treated and not safe for furniture use. Look for pallets stamped “HT” (heat treated) rather than “MB” (methyl bromide treated).Regardless of which seating option you choose, arrange it to face inward around a central point (where your coffee table will go) rather than against a wall facing outward. This single arrangement decision transforms the space from “chairs on a patio” to “a room with purpose.”
Step 3: A Coffee Table That Anchors the Room (Budget: $0-$50)
The coffee table is the centerpiece of your outdoor living room — the surface where drinks rest, candles glow, books sit, and flower arrangements live. It anchors the seating arrangement and gives the room a focal point that draws the eye inward.
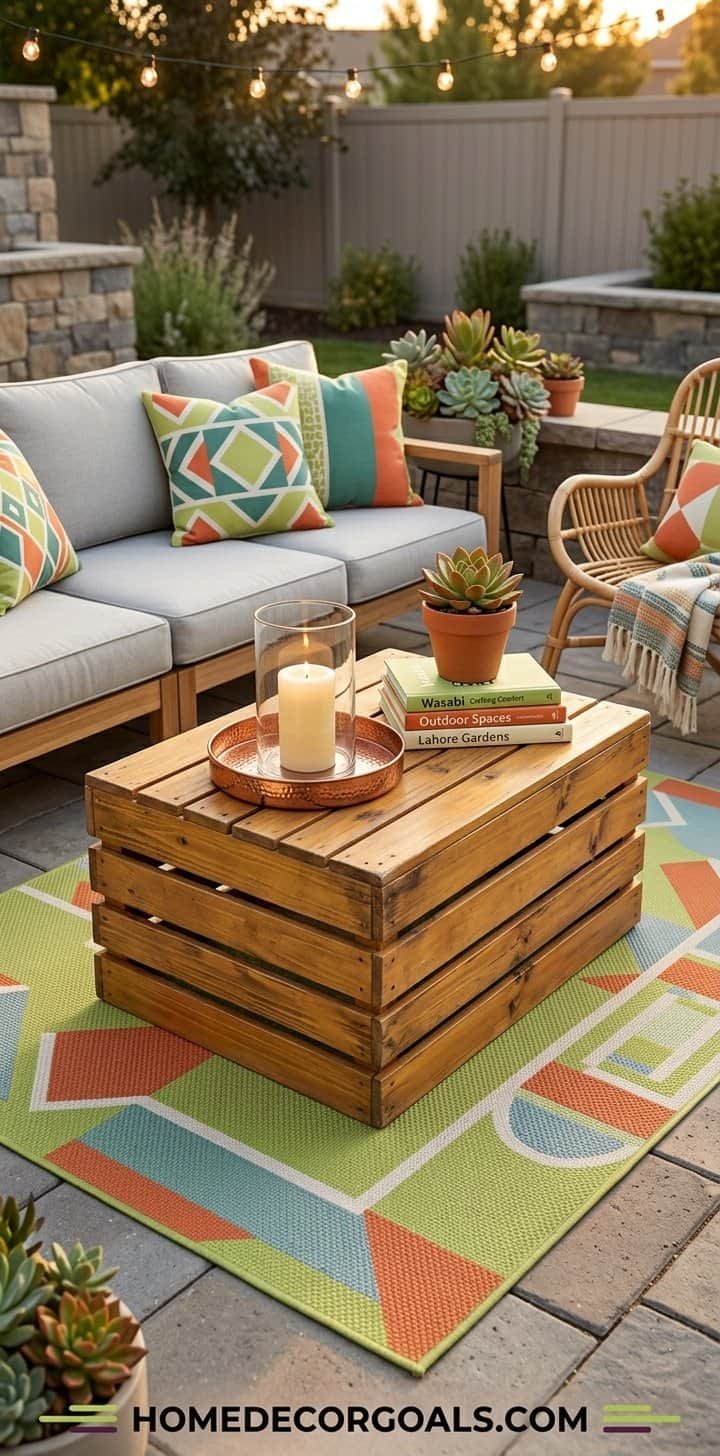
The $0 Option — Stacked Crate Table: Two wooden crates (available free from grocery stores, liquor stores, or Craigslist) stacked on top of each other and optionally stained or painted create a perfectly functional and surprisingly stylish coffee table. The open sides provide built-in storage for throw blankets, magazines, or outdoor games. Sand the rough edges, apply one coat of outdoor wood stain ($8 for a small can that covers multiple projects), and you have a table that looks intentionally rustic rather than accidentally cheap.
The $15-$30 Option — Thrift Store or Garage Sale Find: Thrift stores, estate sales, and garage sales are gold mines for outdoor coffee tables because people frequently sell perfectly good outdoor furniture for a fraction of retail when they move, upgrade, or downsize. A solid wood or metal coffee table from a thrift store for $15 to $30, wiped down and possibly spray-painted in a fresh color ($5 for a can of outdoor spray paint), becomes a one-of-a-kind piece that no one else has.
The $30-$50 Option — Garden Stool or Side Table Pair: Two matching ceramic garden stools ($15 to $25 each at HomeGoods, TJ Maxx, or Target) placed side by side create a coffee table surface that is weatherproof, requires zero maintenance, and adds sculptural visual interest to the seating area. Garden stools come in colors and patterns ranging from classic blue-and-white chinoiserie to modern solid metallics. They are heavy enough that wind will not move them and durable enough to last a decade outdoors.
Place the coffee table in the center of your seating arrangement, equidistant from all seats. Style it with a small tray holding a candle, a small plant, and whatever seasonal accent fits the month — a small pumpkin in fall, a seashell in summer, a pine cone cluster in winter. The styled coffee table is the detail that makes guests say “this is so cute” and reach for their phones to photograph it.
Step 4: Lighting That Creates the Mood (Budget: $15-$40)
Lighting is the element that transforms an outdoor living room from a daytime space into an all-evening destination. Without lighting, your outdoor living room becomes unusable the moment the sun goes down — which, during summer, means you lose the best hours of the evening. With the right lighting, the space actually gets better after dark, because artificial light creates intimacy, warmth, and atmosphere that daylight cannot replicate.
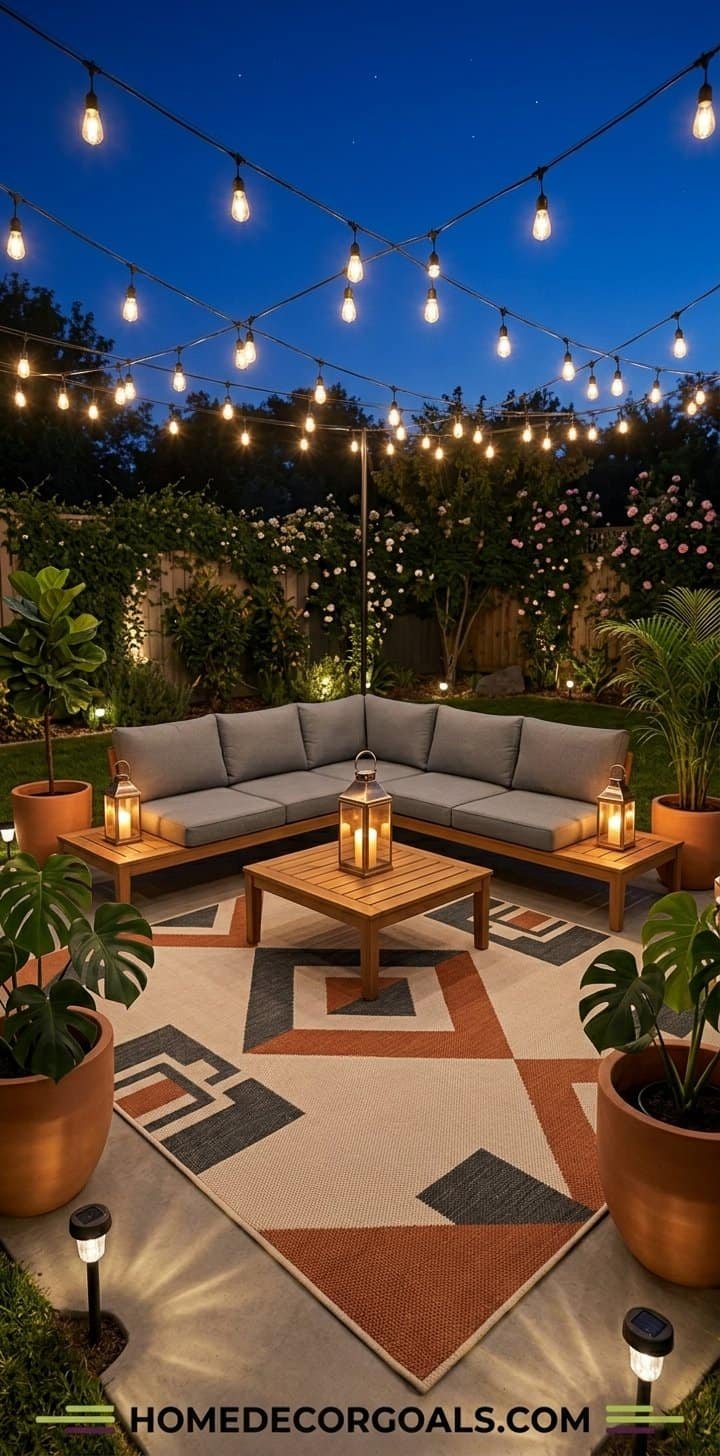
Layer One — Overhead String Lights ($8-$15): Run a strand of warm-white string lights across the space at a height of eight to ten feet. Attach them to the house, fence posts, trees, or tall poles (even an inexpensive shepherd’s hook garden stake works as a light pole). The lights create a “ceiling” over your outdoor room that defines the space vertically the same way the rug defines it horizontally. Your outdoor room now has a floor (the rug) and a ceiling (the lights) — two of the four elements that make a space feel like a room.
Layer Two — Mid-Level Accent Lights ($5-$15): Add two to three lanterns at table height — on the coffee table, on a side table, or on a shelf. Solar lanterns, battery-operated LED candles inside hurricane glasses, or simple jar candles all work. The mid-level light fills the vertical space between the overhead lights and the floor, creating depth and dimension. Without this middle layer, the lighting feels like a ceiling fixture in an otherwise dark room — functional but not atmospheric.
Layer Three — Ground-Level Glow ($5-$10): Place one or two light sources at ground level — a solar pathway light beside a plant, a small lantern on the floor beside the sofa, or a strand of fairy lights wound around the base of a planter. Ground-level light adds the final layer that makes the space feel three-dimensional and enveloping. The warm glow rising from below is what creates the “I never want to leave this space” feeling that defines a truly well-lit outdoor room.
The total investment for all three lighting layers is $18 to $40 — less than a single restaurant dinner — and the difference between a dark patio you avoid after sunset and a glowing outdoor living room you gravitate toward every evening.
Step 5: Throw Pillows and Textiles (Budget: $20-$50)
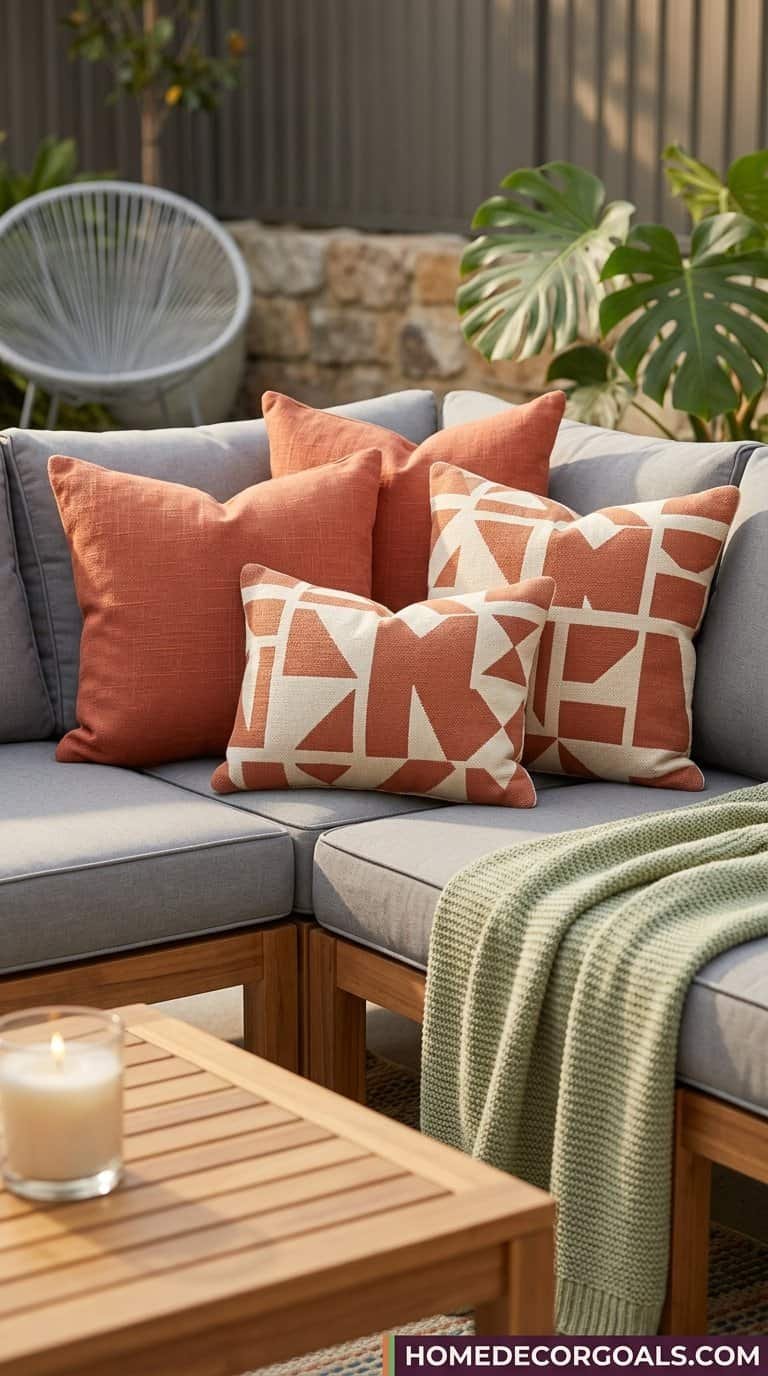
Throw pillows are the fastest, cheapest way to inject color, pattern, and personality into your outdoor living room. They are also the element that most clearly signals “someone designed this space” versus “someone bought furniture and stopped.” A sofa without throw pillows looks institutional. The same sofa with four to six coordinating throw pillows looks styled, inviting, and personal.The formula for outdoor throw pillow arrangement is the same as indoor: pick two to three colors from your rug’s palette, buy pillows in those colors with a mix of solid, patterned, and textured covers, and arrange them asymmetrically on the sofa. For a standard outdoor sofa, four pillows is the sweet spot — two large (18-inch) in a solid color and two medium (16-inch) in a complementary pattern. For a sectional, add two more for the chaise or end section.Buy outdoor-rated pillow covers rather than complete pillows — the covers are cheaper ($5 to $10 each on Amazon), easier to wash, and the inserts can be reused with different covers when you want to change the look seasonally. A single set of four outdoor pillow covers costs $15 to $25 and ships in two days. Swap to warm autumn tones in September, festive colors in December, and fresh pastels in March for a living room that evolves with the year.Add one throw blanket draped over the sofa arm or the back of a chair. Even in summer, evenings cool down enough that a lightweight throw becomes welcome — and during the day, the blanket serves as a design element that adds a layer of texture and warmth to the visual composition. An outdoor throw ($10 to $20 from Target or TJ Maxx) in a coordinating color completes the textile layer that makes your outdoor room feel as intentionally decorated as your indoor one.
Step 6: Plants That Frame the Room (Budget: $20-$50)
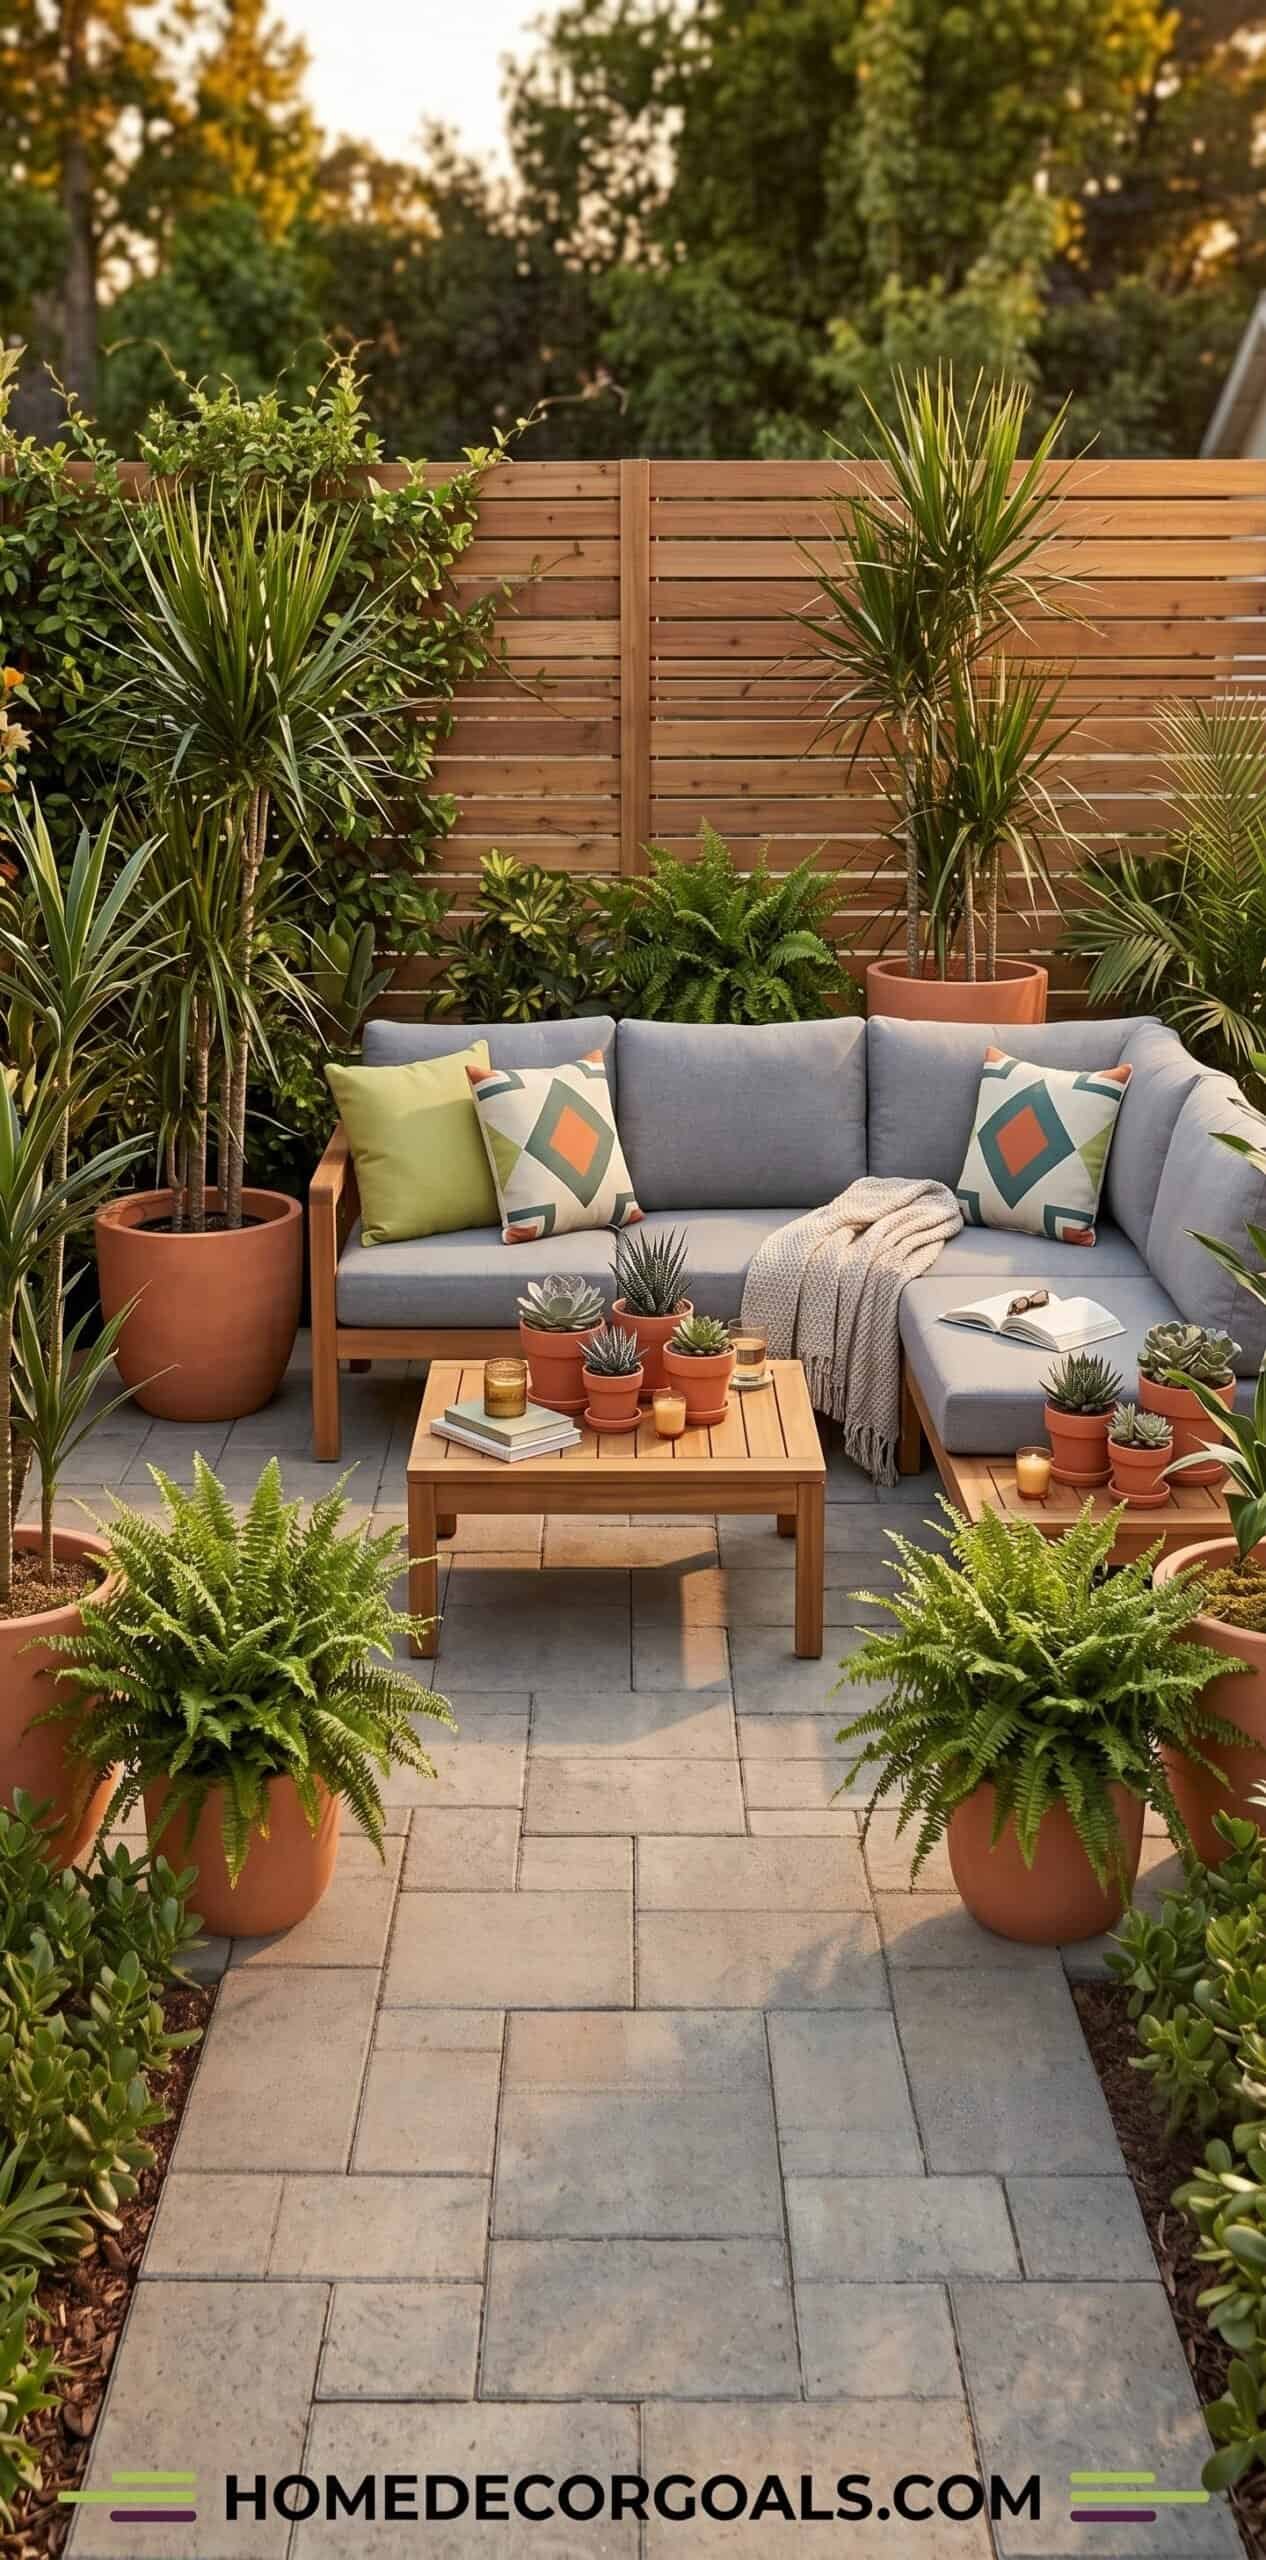
Plants serve as the “walls” of your outdoor living room — they define the perimeter, create a sense of enclosure, and soften the hard edges of fences, railings, and concrete that surround most patios. Without plants, an outdoor living room feels exposed and unfinished, like a stage set that is missing its backdrop. With plants, the space feels enclosed, private, and garden-like — a genuine retreat rather than a decorated slab.
The Perimeter Strategy: Place four to six potted plants at the edges of your seating area — along the fence behind the sofa, in the corners, and flanking the entrance. Use a mix of heights: one or two tall plants (four to five feet, like a dracaena, fiddle leaf fig, or tall grass) for vertical drama, two to three medium plants (two to three feet, like ferns, hostas, or flowering bushes) for middle fill, and two to three small plants (one foot, like succulents, herbs, or small flowers) at ground level for detail.
The height variation creates a visual gradient that looks professional and layered. All-same-height plants look like a row of soldiers. Mixed heights look like a garden that evolved naturally — even though you arranged it intentionally in fifteen minutes.
Budget Plant Sources: The cheapest place to buy outdoor plants is the “rescue rack” or clearance section at any garden center — Lowe’s, Home Depot, and local nurseries discount plants that are past their peak bloom or slightly wilted for 50 to 75 percent off. These plants are not dead — they are stressed, and with a good watering and two weeks of care, they recover fully. A $15 plant on the rescue rack was $45 last week. An entire patio garden of rescue-rack plants costs $20 to $50 instead of $100 to $200 at full price.
Pot Coordination: Even mismatched plants look cohesive if the pots match. Buy a set of matching terracotta pots ($1 to $5 each at Dollar Tree, Home Depot, or Amazon) in the same material and color, and plant your mixed greenery inside. The uniform pots create visual harmony while the varied plants create visual interest — the combination looks designed and professional.
Step 7: The Side Table and Finishing Details (Budget: $10-$30)
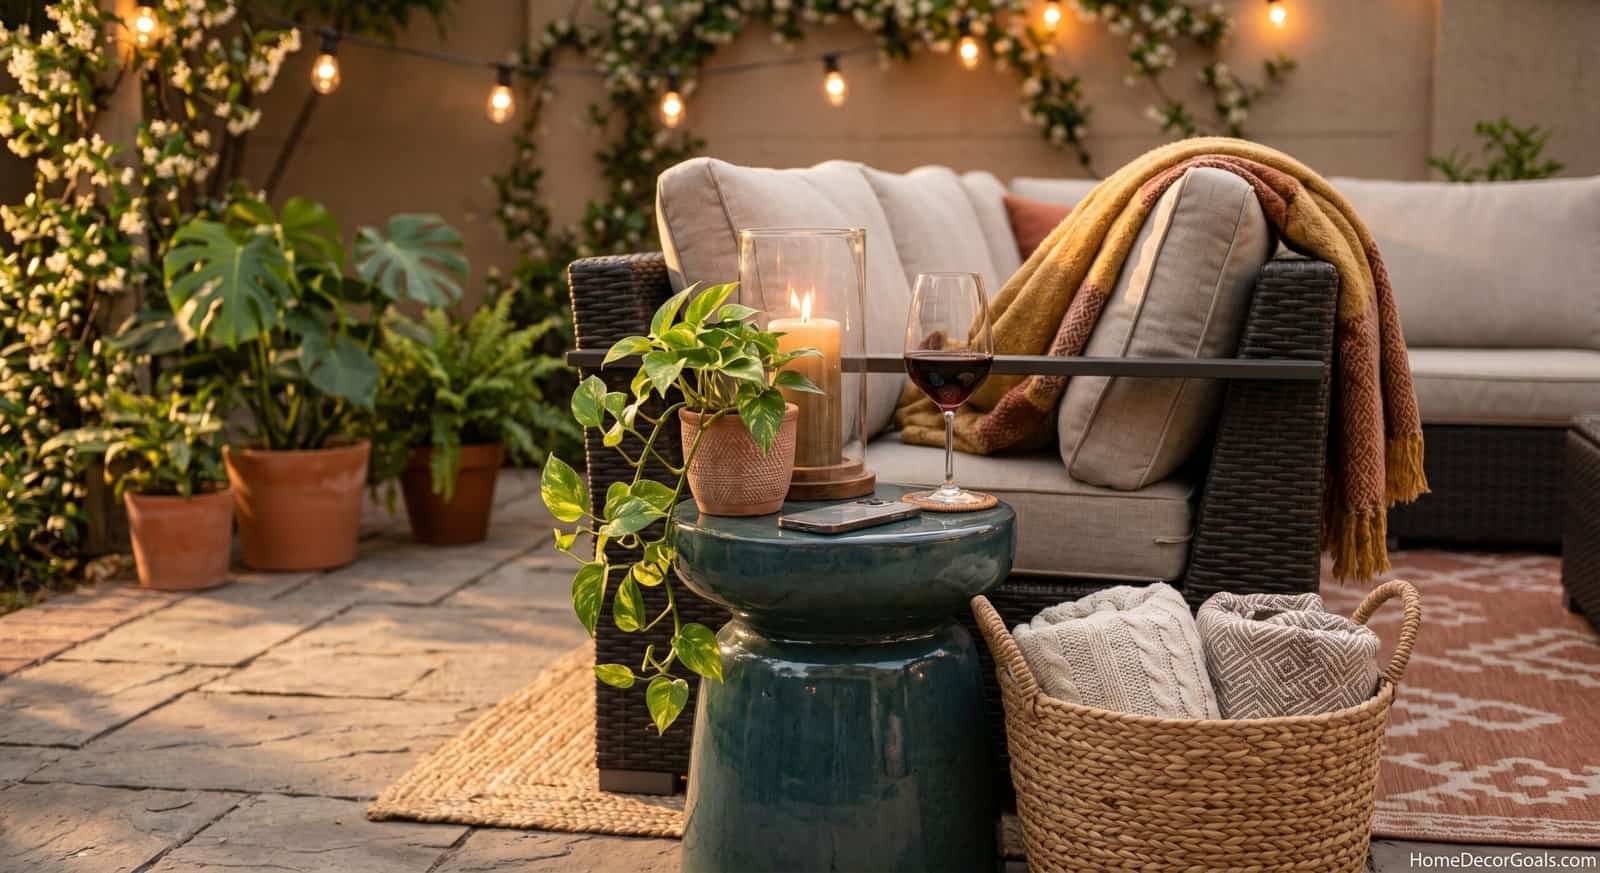
Every outdoor living room needs at least one small side table positioned within arm’s reach of the primary seating spot — because the coffee table is often too far away to set down a drink without standing up. The side table is where your glass of wine actually lives while you are lounging, where your phone charges, where the Bluetooth speaker sits, and where the candle that makes the evening glow rests.
Budget side table options: A small ceramic garden stool ($15 to $25 at HomeGoods or Target) doubles as both a side table and an extra seat when guests visit. An overturned large planter or sturdy bucket serves the same function for $5 to $10. A tree stump, if you can find one locally, provides a completely free rustic side table that lasts for years outdoors. A small folding tray table ($10 to $15 at any big box store) provides a functional surface that stores flat against the wall when not needed.
Finishing details that complete the room: A small tray on the coffee table containing a candle, a plant, and a decorative object creates a vignette that makes the table look styled rather than just functional. A basket beside the sofa holds extra throw blankets and pillows during the day. A hanging planter at the corner of the ceiling adds a final layer of greenery overhead. A small doormat at the transition from inside to outside signals the threshold between rooms.
These finishing details individually cost $2 to $10 and collectively take the outdoor living room from “nice setup” to “wow, this looks like a magazine.” The difference between a good outdoor room and an extraordinary one is always in the small details that demonstrate care and intention.
Complete Budget Breakdown: Outdoor Living Room for $200, $350, and $500
The $200 Outdoor Living Room
Outdoor rug (5×7): $30
Used sectional or loveseat (Facebook Marketplace): $80
Total: $200 — A complete, functional, beautiful outdoor living room.
The $350 Outdoor Living Room
Everything above, plus:
Interlocking deck tiles over concrete: $85
Second strand of string lights: $10
Side table (garden stool): $20
Two additional plants: $15
Outdoor curtains on tension rod: $20
Total: $350 — An elevated space with a transformed floor and added privacy.
The $500 Outdoor Living Room
Everything above, plus:
New outdoor sectional (Walmart or Target): $250 (replacing used one)
Bluetooth speaker: $25
Fire pit (small portable): $35
Additional lanterns and candles: $20
Seasonal decor accessories: $20
Total: $500 — A magazine-worthy outdoor room with premium comfort.
AI IMAGE PROMPT 9: A three-panel comparison showing outdoor living rooms at three budget levels, left panel showing a clean simple $200 setup with used sofa, rug, and string lights, center panel showing an elevated $350 setup with deck tiles, curtains, and more plants, right panel showing a full $500 setup with new sectional, fire pit, and complete styling, each panel labeled with its budget, all three looking inviting and intentional at their respective price points, HomeDecorGoals.com watermark at bottom right, photorealistic budget comparison photography
Pro Tips From Someone Who Made Every Mistake
Start with one corner and expand. You do not need to do everything at once. Begin with a rug, a single chair, and string lights. That alone transforms the space enough to motivate you to add the next piece. Building the room over several weeks or months also lets you find better deals on each item.
Always measure before buying. Outdoor furniture that looks perfectly sized in a showroom or online photo often overwhelms a small patio. Measure your available space, subtract two feet on each side for walking room, and buy furniture that fits the remaining footprint. A sofa that is four inches too wide ruins the proportions of the entire room.
Invest in weather protection. A $15 furniture cover set from Amazon saves your entire outdoor living room during rain, storms, and off-season months. Without covers, cushions mold, metal rusts, and wood warps. With covers, your $200 outdoor room lasts three to five years looking like the day you set it up.
Face the seating toward the best view. Whether your view is a garden, the sky, a fence covered in climbing plants, or the back of the house where the kitchen window glows warmly — orient the sofa to face whatever is most visually appealing. Your eye should rest on something beautiful when you sit down.
Add one personal touch that makes it yours. A vintage sign. A framed photo in a weatherproof frame. A specific plant that has meaning to you. A candle in a scent that defines summer. The personal element is what separates “nice outdoor room” from “this is my favorite place in the world.”
AI IMAGE PROMPT 10: A person relaxing in their completed budget outdoor living room in the evening, leaning back on the sofa with bare feet on a pouf, string lights glowing overhead, a candle flickering on the coffee table, a glass of wine in hand, a book face-down on the cushion beside them, plants surrounding the seating area, the person looking completely at peace and content, the outdoor room clearly being their favorite place, the scene radiating comfort and happiness and pride of creation, HomeDecorGoals.com watermark at bottom right, photorealistic evening relaxation photography
Frequently Asked Questions
Can I create an outdoor living room in a rental?
Absolutely. Every element in this guide is renter-friendly — outdoor rugs, freestanding furniture, command-hook lighting, potted plants, and portable accessories all install and remove without any permanent modification. The rug lifts up, the lights unhook, the plants carry away, and the furniture moves with you. Your landlord will never know the patio was transformed.
What is the most important element to invest in first?
The seating. A comfortable place to sit is what determines whether you actually use the outdoor room or just look at it from inside. Start with a quality seating piece — even a single comfortable chair — and build everything else around it over time.
How do I protect outdoor furniture during winter?
Cover everything with fitted furniture covers (available in sets for $15 to $30 on Amazon). Store cushions and textiles inside or in a waterproof deck box. If possible, move lightweight furniture into a garage or shed. Outdoor rugs should be rolled and stored dry. Spring setup takes about thirty minutes if everything was properly stored in fall.
What if my patio is ugly concrete?
An outdoor rug covers the majority of visible concrete immediately. Interlocking deck tiles ($85 to $140 for a small patio) transform the entire surface into a warm wood floor. Potted plants along the edges hide the concrete perimeter. With these three elements, the concrete becomes invisible and the space reads as an outdoor room rather than a concrete pad.
How long does a budget outdoor living room last?
With proper seasonal care (covering furniture in rain, storing cushions in winter, shaking out the rug regularly), a $200 to $500 outdoor living room setup lasts three to five years. Individual elements will need replacing on different timelines — cushion covers every one to two years, the rug every three to four years, and quality furniture frames lasting five years or more.
Is an outdoor living room worth the investment?
Yes. An outdoor living room effectively adds a room to your home for $200 to $500, compared to a home addition that costs $20,000 to $50,000. It increases your usable living space, provides a dedicated relaxation area, improves your home’s visual appeal for resale, and most importantly — gives you a reason to spend time outside, which has proven mental and physical health benefits.
AI IMAGE PROMPT 11 (Pinterest Pin): A Pinterest-optimized vertical image (1000x1500px), a gorgeous budget outdoor living room at golden hour as the background — string lights, comfortable seating, rug, plants visible — bold text overlay reading “How to Create an Outdoor Living Room on a Budget”, subtitle “Step-by-Step Guide + Budget Breakdowns”, warm earth tones — terracotta, sage, cream, gold, HomeDecorGoals.com watermark at bottom center, the ultimate save-worthy outdoor decor pin, photorealistic with professional text overlay
The room you have been dreaming about is already there — right outside your back door, waiting to be designed. It does not require a contractor, a trust fund, or a design degree. It requires a rug, a comfortable seat, some lights, a few plants, and the decision to treat that space with the same care and intention you give to the rooms inside.Start this weekend. Lay a rug. Pull up a chair. Hang some lights. And sit outside in your new room as the sun goes down and the string lights come on and the whole world shrinks to just this perfect, glowing, comfortable space that you built with your own hands and your own vision.That is your outdoor living room. You made it. And it is beautiful.Pin this guide and visit HomeDecorGoals.com for more budget-friendly home transformation ideas that prove beautiful spaces do not require big budgets.

")

